Welcome to our blog! Learn about our farm operation, public programs, and the people behind our work through the Notes from the Field and Education sections. Peruse the Recipes section for some staff favorites.
Waltham Fields Community Farm (incorporated as Community Farms Outreach, Inc.) is a nonprofit farming organization focusing on sustainable food production, fresh food assistance, and on-farm education. For more information about Waltham Fields check out our website!
One of our summer program's biggest hits on the snack circuit was our Salsa Fresca! While we encouraged the kids to try cooking new dishes without calculated recipes, these are the ingredients you'll likely want on hand if making the salsa:
Must haves:
fresh tomatoes (diced)
onion
fresh cilantro
salt
cumin (ground, not whole seed)
olive oil
your favorite chip or cracker for salsa dipping
Here are some optional additions we used this summer:
fresh garlic
bell pepper
cucumber
zucchini (diced or sliced thin for chips!)
basil
chives or leeks
Media (text and image) created and published by Rebekah Carter 2010.
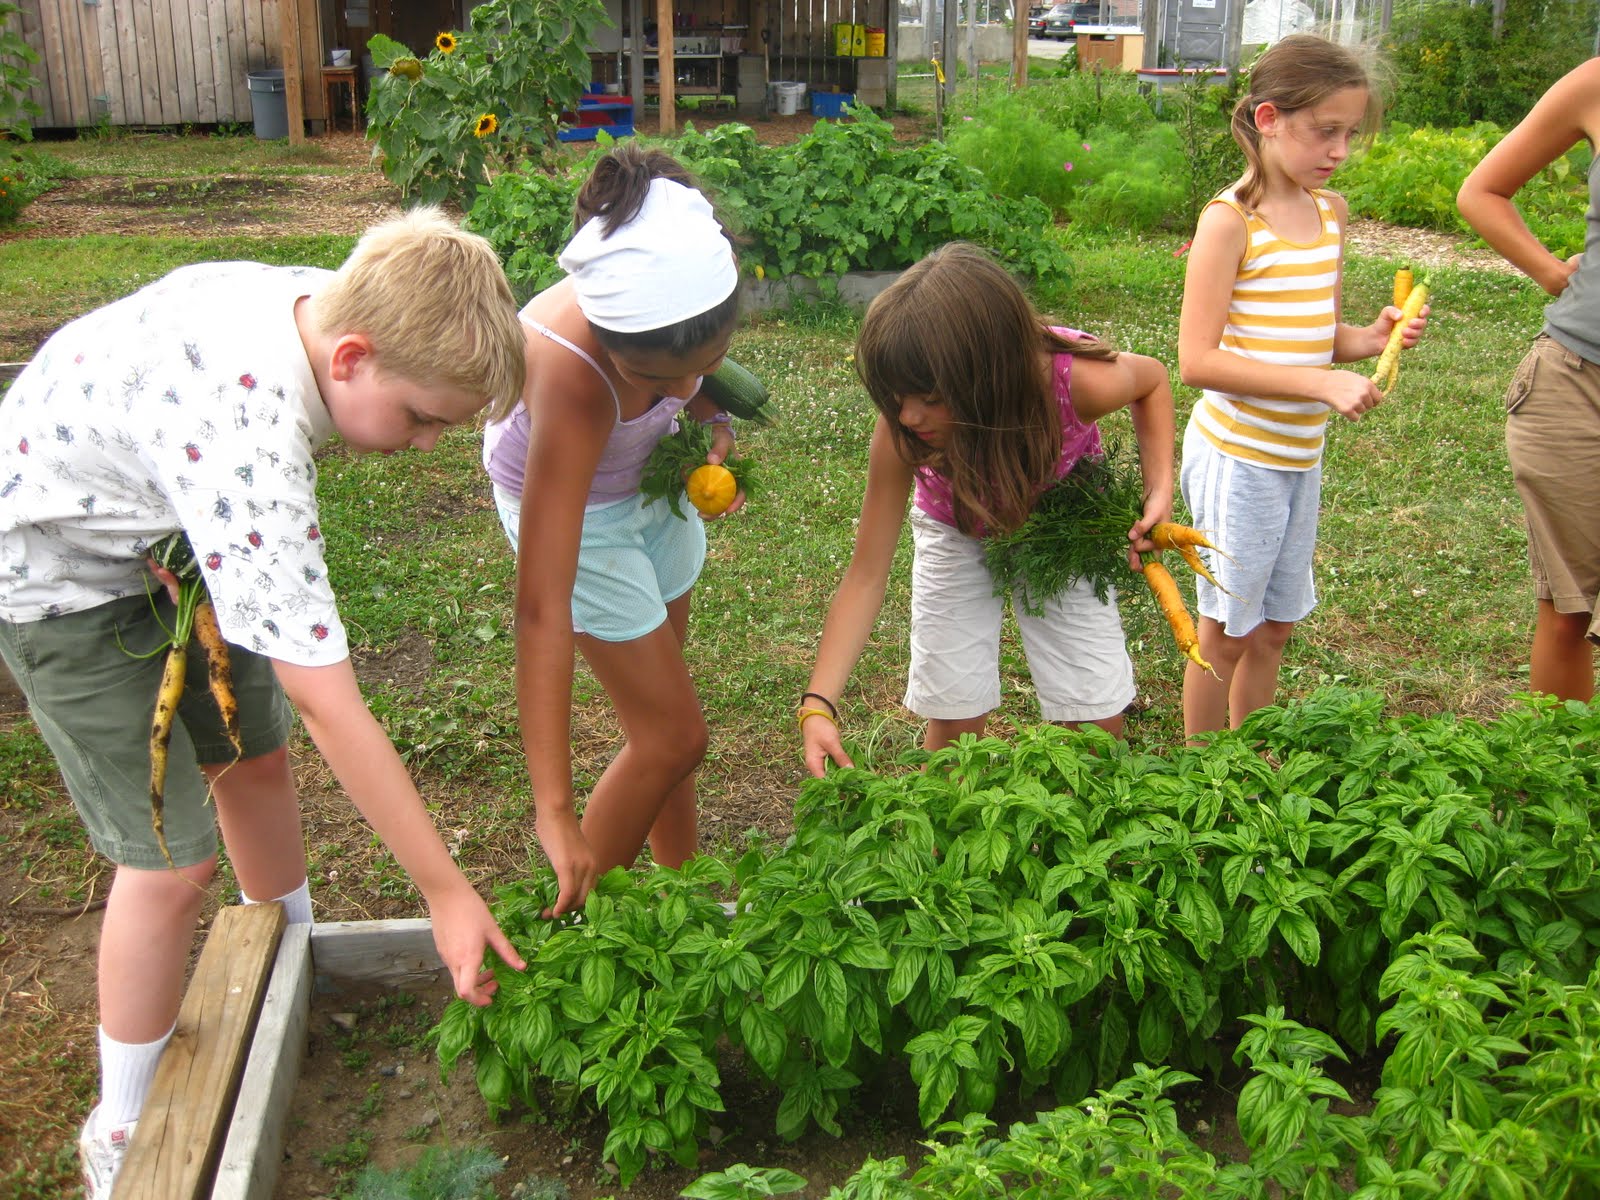
A key component of our Learning Garden programming is establishing "farm-to-plate" connections between the kids and the food they eat. By working directly in the garden and allowing the kids to cook up their own healthy snacks in our outdoor kitchen, they are better able to understand and appreciate how food is grown, distributed and prepared, as well as its nutritional significance to human health.
All of our snacks are vegan and are mostly free of nuts and seeds. If you have a particular concern about your son or daughter, please contact Jericho (jericho@communityfarms.org) so that we can do our best to accommodate your child's needs.
Media (text and image) created and published by Rebekah Carter 2010.
The beauty of the Children's Learning Garden rests not only in its luscious, green glory, but also in its ability to bring children together to learn about the land, farming, and food production.
Getting through the drought
Garden work, including seeding, transplanting, weeding, watering, and harvesting, helps kids develop an understanding of the plant world and its importance to humans, animals, and ecosystems all over our planet.
Collecting basil
By taking part in all aspects of the plant life cycle, the children gain a stronger appreciation for their food and the life-giving nutrients it provides us.
Food's more fun when you grow it yourself!
In the Learning Garden, we try to grow a variety of interesting fruits and vegetables like the ones that you 'll see highlighted in our blog, as well as a number of staples that kids (and adults!) love to eat. If you or your child have any suggestions for next year's crops, feel free to email your ideas to us at wfcfblog@gmail.com.
Media (text and image) created and published by Rebekah Carter 2010.
Alpine strawberries (fragaria vesca) are naturally occurring in the northern hemisphere and are believed to have been eaten by humans since the Stone Age. First cultivated by the Persians, the seeds were brought on the silk road towards the Far East and to Europe, where the plant species gained popularity until the introduction of the larger garden strawberry in the 18th century.
They may be small, but alpine strawberries are strongly flavored and are still used today in jams, sauces, liqueurs, cosmetics, and alternative medicines.
Strawberries are an excellent source of fiber and vitamin C (just one cup has your daily requirement!) and a good source of folate, other B vitamins, and trace minerals. Enjoy them raw as a snack or put atop your cereal or yogurt.
FACT: Alpine strawberries are also known as wild strawberries or Fraises des Bois, pronounced "frez-day-bwah," meaning "strawberries of the woods" in French.
Media (text and image) created and published by Rebekah Carter 2010.
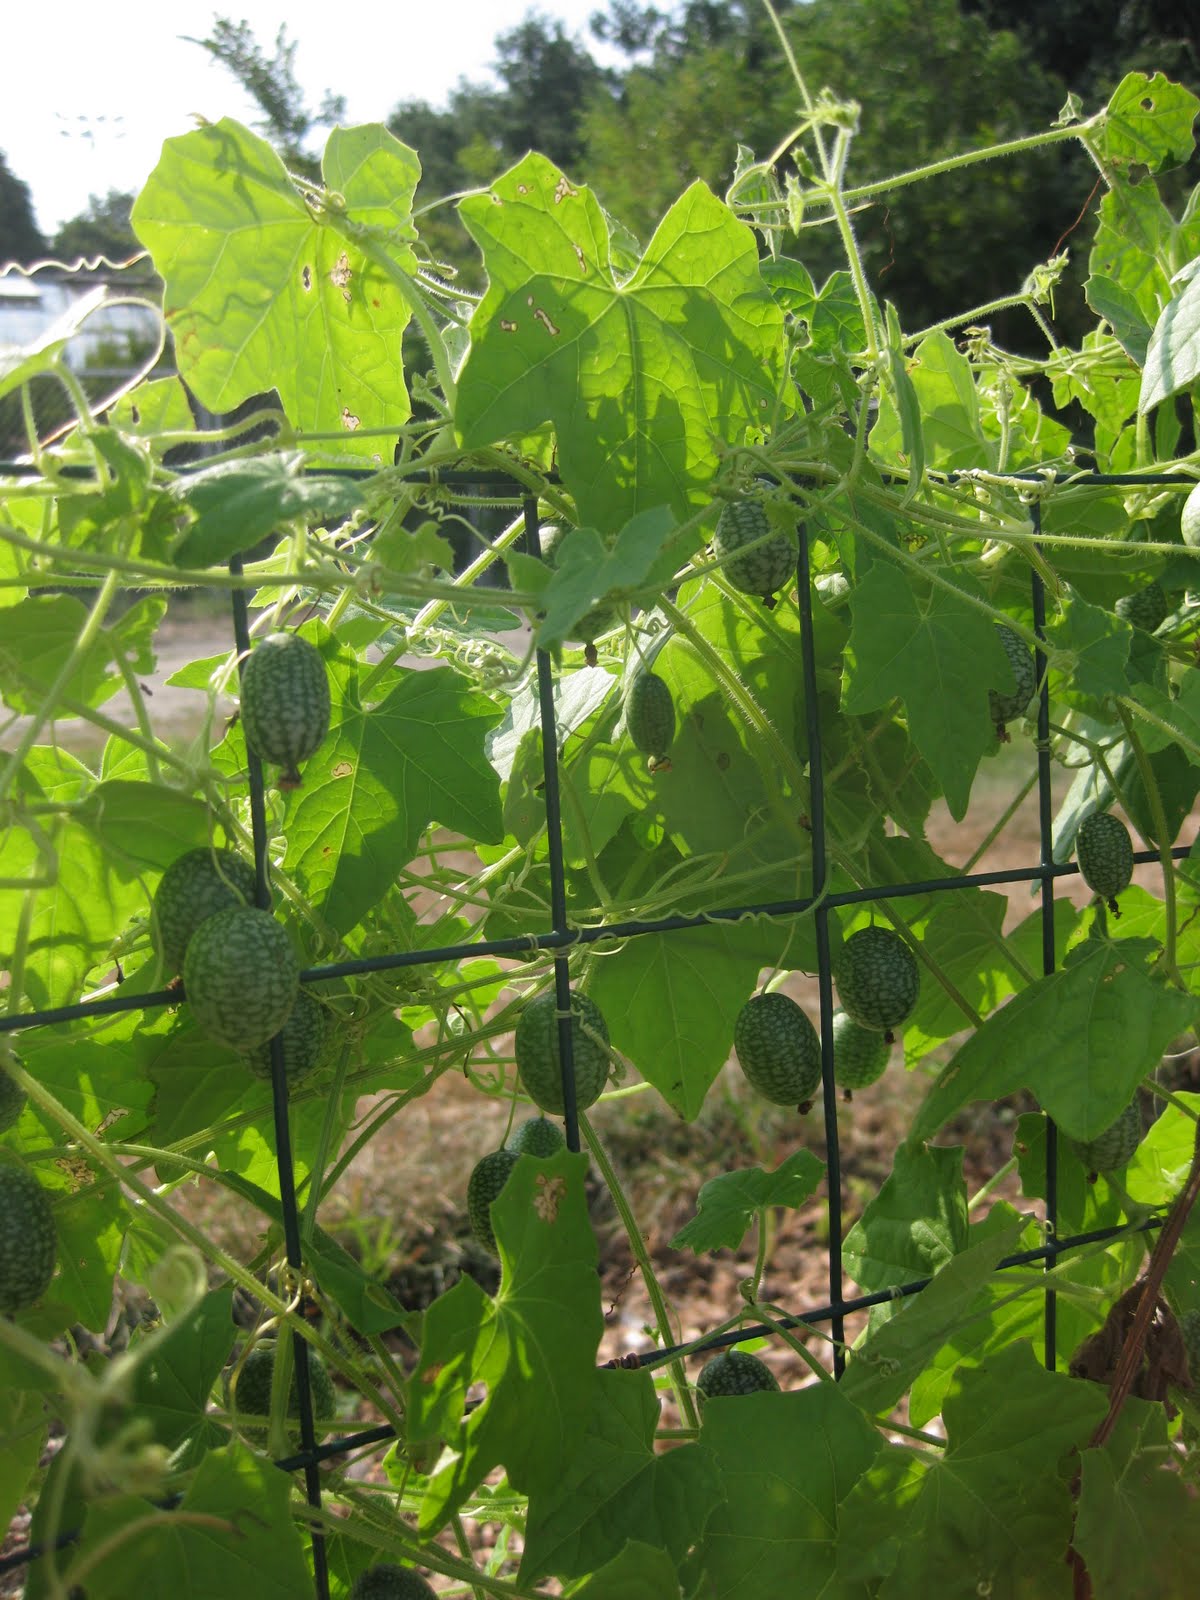
Mexican Sour Gherkins (also called pepquinos, mouse melons, or cucumber melons) are an ancient variety of cucumber originating from South America. It is a "micro-cucumber" with a slightly sour taste. A great addition to salads and stir fried vegetables, pepquinos can also be eaten raw as a quick snack or pickled like its larger cucurbit relatives.
Pepquinos, ready for harvest (right)
Media (text and image) created and published by Rebekah Carter 2010.
One of our favorite activities in our Learning Garden programming this summer was our discussion-based "Parts of a Plant" exercise. Much like it sounds, the exercise asks the children to identify the six basic parts of a plant, discuss their individualized purpose, and to classify various food items as root, stem, leaf, flower, fruit, or seed.
Regardless of age or botanical experience, the activity encourages the kids to work together in identifying common foods as essential components of an entire organism and even-larger ecosystem. Best of all, this exercise can be used just about anytime or place! Continue the activity at farmers markets, restaurants, grocery stores, community gardens, and other local farms.
Media (text and image) created and published by Rebekah Carter 2010.
Gourds have been used by humans as food, tools, and utensils for centuries. Today, ornamental gourds are still grow for the beauty they bring to gardens and households year round. An easy, low-maintenance, high-yield crop that's excellent for first-time gardeners and kids, gourds can be harvested and cured, allowing them to last indefinitely.
How to Harvest Gourds
Harvest gourds when their stems have dried up and turned brown.
Cut gourds off vine, leaving a few inches of stem on the gourd.
Be sure to harvest gourds prior to heavy frost; discard bruised or spoiled fruits.
How to Dry Gourds
Wash gourds with soapy water and allow to dry completely.
Arrange gourds in a well-ventilated area away from direct sunlight for one week; the skin should harden and change color.
Spread the gourds on a screen or rack and place in a well-ventilated, dark area where they will remain for six months; be sure that none of the gourds touch each other.
Check on your gourds every other day or so, making sure to dispose of any spoiled fruits. If a bit of mold appears on a gourd, try rubbing it off with a cloth dipped in a diluted bleach solution (the fruit should be fine for curing if the mold wipes off).
Turn the gourds every couple of weeks to prevent spoilage and allow for even drying.
The gourds are "cured" when they are light, hard, and the seeds can be heard rattling when the fruit is shaken.
What to do with Dried Gourds
Carve, paint, wax, sand, or decorate
Make a birdhouse
Carve a Jack-O-Lantern
Media (text and image) created and published by Rebekah Carter 2010.
Last month, Waltham Fields hosted a workshop exploring two traditional food preservation techniques: water-bath canning and lactic-acid fermentation, used for sauerkraut and kimchi, a traditional Korean dish of fermented vegetables. Taught by the farm's own Jericho Bicknell and guest instructor Audra Karp, the duo showed a small class of local adults the step-by-step processes for making dill pickles and sauerkraut. For more information about food preservation, please reference the USDA Home Canning Guide.
Dill Pickles
(Makes seven pints)
30-40 medium pickling cucumbers, about 5 inches long
3/4 cup sugar
3/4 cup canning salt
1 quart apple cider vinegar
1 quart water
7 fresh dill heads 7 cloves garlic
Mix together sugar, salt, vinegar, and water, and bring to a boil. Scrub cucumbers, remove stem and blossom ends; cut lengthwise into quarters, not longer than the shoulder height of the jar. Put 1 whole head of fresh dill and 1 clove garlic into each clean, hot jar. Pack the jars with cucumbers upright. Pour in the boiling brine (vinegar mixture), leaving 1/2 inch headroom. Adjust lids. Process in boiling water bath (212 F) for 10 minutes. Remove jars and let cool.
Sauerkraut (Makes 1 quart)
1 medium head of cabbage (remove outer leaves)
1 onion
2-3 carrots, scrubbed
3-4+ cloves of garlic Sea salt (1 heaping tsp to 1 lb of veggies) Chop or shred carrots and cabbage, being sure to remove any bruised or dark spots. Toss vegetables in a bowl with salt and mix well. Chop the onion and mince the garlic, then add them to the bowl. Let the salt pull out some water from the cabbage for some time, stirring occasionally. Press the ingredients into a clean glass jar until liquid comes out the top, leaving about an inch of air space. Cover and leave at room temperature for 3-4 days, pushing down the veggies once per day as they produce gas. Transfer the kraut to cool storage and let it ferment at least two additional weeks. The sauerkraut can be eaten immediately, but improves with age. Suggested Reading:Putting Food By by Janet Greene, Ruth Hertzberg, and Beatrice Vaughan
Originally published in 1973, Putting Food By is considered an excellent resource for home food preservation techniques. It includes information on freezing, pickling, drying, curing, and preserving, as well as new canning procedures, processing times, and tested recipes.
Media (text and image) created and published by Rebekah Carter 2010.
 Must haves: