Welcome to our blog!

Welcome to our blog! Learn about our farm operation, public programs, and the people behind our work through the Notes from the Field and Education sections. Peruse the Recipes section for some staff favorites.

Waltham Fields Community Farm (incorporated as Community Farms Outreach, Inc.) is a nonprofit farming organization focusing on sustainable food production, fresh food assistance, and on-farm education. For more information about Waltham Fields check out our website!

Showing posts with label garlic. Show all posts

Friday, July 29, 2016

Let's All Do A Rain Dance!

As I see it now, the theme of the summer is easily summed up in two words: HOT and DRY.  It literally feels like the dust bowl out there and I can't really remember the last time we had a soaking rain.  The sun felt strong this week and although it's physically challenging work, I feel more connected to our Earth and our food through this challenging weather.  We as farmers spend most of our waking hours absorbed in the same environment as the food we grow and eat.  It feels similar to when you share a meal with someone and you are all eating the same thing.  Knowing that we as a crew and as a community share the same sun rays as the plants, the same temperature, and live on the same soil, keeps me going on those long, hot days.  There is a freedom in simply being in our environment in all weather and letting go of our comfort zones.  This is when I see the most growth and change in my life.      
Our morning routine this week has been to head straight for the water and in every direction possible.  We are using all the tricks we can.  Our aluminum pipe system has taken up residence in our newly planted west field, taking care of our fall brassicas, chard, lettuce, and beets.  This system which delivers the most water through overhead sprinklers requires us to move about 7 long aluminum pipes across the fields.  It feels as though you could pole vault with these - they are much lighter than one would think.  It's quite empowering to carry them on your shoulder and I must say that Erinn and Dan both do it with such grace, each able to carry two pipes at once. 

Second, we have the water reel (not to be confused with the water wheel which is used when transplanting).  This is just a couple years old now and let me tell you, it's a work out setting it up.  It is a retractable hose with a sprinkler attached that covers about 7 beds in either direction depending on the wind.  When Janelle and I pull it out at 7am, we debate over who will get the full body workout and who gets just intense arm strengthening.  It's a great way to wake up in the morning if you ever get a chance to try it.
Yet another way is our drip lines that remain under our biodegradable plastic used with our tomato, eggplant, and onion crops to name a few.  Although this takes more time and possibly more money upfront to lay down on the beds, it is ultimately a more efficient system and requires us only to turn the faucet or pump on for a few hours assuming the pump is working...  It does require time for setup and repairing of holes, but the water goes directly to the roots avoiding the pathways and foliage of the plants.  It also does not compact the soil as much as an overhead sprinkler system. 
Lastly, we are even using your run-of-the-mill home oscillating sprinkler which works great for directly seeded crops like our carrots, but also has saved the flowers which I will
add are STUNNING! Erinn has done an amazing job! With all of these methods of watering we must think strategically in order to be most efficient with our time and energy as well as conserving water where possible - which is what farming is all about.  We need to think about how long the water reel will take to run, which pipes have more pressure, what crops are in dire need, what covers the most amount of space, what will need transplanting next, etc.   

Last week marks the end of an era and the beginning of many others.  Summer education programs started last week and it's refreshing to have so many young people on the farm.  There is so much discovery and exploration happening and it puts a smile on my face.  A couple weeks ago a little girl asked me as I was in the wash station, "Are you a farmer?" and I replied "Yes I am, who are you?" and she proceeded to tell me her name.  It's such a delight to have so many levels of education happening in one place. 


We finished harvesting the garlic which had been in the ground since November, so it felt like a big deal.  This particular garlic really went through the ringer.  It sprouted in December and then we quickly mulched it with leaves.  It definitely experienced some deep frosts and did not receive much water or fertilization.  We didn't even need to weed it all season!  But to both Erinn's and my surprise it is some of the most beautiful garlic we have had in a few years.  The garlic will now cure in our greenhouse for a couple of weeks so that it will be able to store for the winter months.   
As for the summer vegetables, such as tomatoes, eggplants, peppers, and carrots, they are moving along and should be ready very soon.  Luckily for these crops the heat and sunshine is perfect - we just need to keep watering.  The routine continues of seed, transplant, water, weed, water, harvest, and repeat.  And did I say water?      


I will leave you with a quote Amanda shared a few years back at this midsummer time. "The beat of time is like the throb of a healthy heart, strong, steady and reassuring...it is the richness and the ripeness of the earth again made manifest. And man participates, if he will, not as proprietor but as a participant in life itself." -Hal Borland.


Enjoy the summer, the harvest, and the world around us,
Anna Kelchlin
Assistant Farm Manager
for the Farm

Friday, July 22, 2016

The Full Strength of July


It seems as though the season is moving along at such a quick pace.  It's already the second week of July!  Cooler weather crops have come and gone, and we are settling surely into the summertime.  We are nearing the end of greenhouse seeding for the season (just two weeks left!)...thus closing the spring and looking ahead to the fall
as we start to plant autumnal brassicas.  I was amazed, standing in the field the other afternoon with Erinn and Anna as we checked on the recently transplanted broccoli seedlings: they're taking root so fast!

The crew seems to be mimicking that rooting behavior.  Last week we welcomed a fourth field crew member Andre to the team and it feels like we are really hummin' now.  The jokes and camaraderie are as plentiful as the harvest.  We've enjoyed fresh cucumber popsicles made by Stacey, and ended one Friday with an intense race to plant celery.  We split into two teams, and among all of us we planted two 200' beds in under fifteen minutes!  Imagine eight sweaty farmers at the end of their week, bent over planting, yelling, laughing, and moving faster than tractors, all within inches of each other.  Strategizing, competition and motivation were at an all-time high.  It was neck and neck to the end and totally incredible.  And, in case you were wondering, my team won...

            Despite the dry weather, the farm looks lush right now.  The squash and zucchini plants are deep green and huge, and I've never seen such consistently beautiful lettuce.  Both our Lyman and Weston fields are in the groove as well, and the potato plants are up to my knees! Some highlights of the past week have felt like benchmarks.  Dan and Erinn finished tying the first round of tomatoes, and we began the garlic harvest last week.  I won't say too much, but it's coming out of the ground and looking impressive.  The flower field is blooming and every day I fall more in love with the snapdragons.  We are watering nonstop.  I must say I am feeling the full strength of July now.
As we make our way into another warm week, I remind myself of the ebb and flow of this work.  There are patterns and rhythms, joys and frustrations.  Sweltering days and moments of reprieve.  It seems as though we are finding our stride now.  Erinn asked me the other day what my favorite thing to do on the farm is... I simply can't choose.  Since April, I have learned so much about farming, and while our days follow a pattern, there's always something new, whether it be a small victory or an interesting challenge.  The first harvest of the morning is always my favorite and I hope you enjoy it on your plates as much as I enjoy harvesting it from the field.
Until next time ~     Janelle, for the crew

Wednesday, June 22, 2016

Notes From The Field: Sunshine

Summer time is upon us in full bloom and I must say when I step back, breathe, and look at the whole picture, the farm is absolutely radiant.  The sun is now at its highest point in the sky extending its rays with great intensity upon each and every being below.  Last week the sun made itself known.  It's that time of year when we must pull out the big hats, the sun lotion, and hydrate.  Even the greenhouses must wear sun protection.  The shade cloths will go up this week so that the seedlings can tolerate the heat to come.  This is the time of year when our farming days come the closest to the length of the daylight.  It would be neat to see a time lapse of all the places we go and the work we do throughout the day: we are like humming birds, never stopping to rest our wings. 
Each morning Janelle and I harvested lettuce at our Lyman Fields, rushing to get the harvest done to be back before the field crew begins at 8am. The field crew was the newest edition to the staff last week and is making the transition into farm life in June: harvest and a lot of transplanting.  The mornings start off cool but before we know it the sweaters are off and a sweat is already broken.  Erinn and Naomi harvested the last of the lettuce for the Waltham Public Schools.  Radishes are beginning to bulb up and the bok choy is a bit bigger than the last generation. 

The garlic scapes we picked in the morning were so juicy and aromatic that even that evening in my yoga class I could smell them as I came into downward-facing dog.  I'm glad I love the smell of garlic!
We were able to plant the rest of the peppers and cantaloupe last week at our fields in Weston.  Our 4th generation of beets went in at Lyman as well as the eggplant thanks to a volunteer group through Boston Cares.  At our Waltham site we put in round two of cucumbers as well as okra and more lettuce.  On Saturday we had an amazing turn out for our biannual Crop Mob - we were able to collect and put away all the bags, hoops, and floating row cover from the spring brassica plantings.  This was a huge feat and had been weighing on our minds.  
Crop Mobsters rescuing the Swiss chard! 

Now we will be able to fertilize, cultivate, and water the kale, collards, and cabbages.  In addition, we weeded two beds of Swiss chard and 5 beds of carrots.  It is refreshing to see how people who have never met each other can come together and work together to create such a change in the landscape.  Thank you all so much for supporting this event.  If you weren't able to make it we will be hosting one more on July 23rd.
June is a challenging time of year in that we have an overwhelming amount of work to do, but more so in that it is a time of transition.  With each week harvest increases in size, time, and space.  We are heading into the hot, sunny and dry weather when we must think constantly about irrigation.  There is still seeding to be done both in the greenhouses and in the fields.  Transplanting must continue at a steady rate as well as everything that leads up to it.  And don't forget the weeds.  They are fierce and seem to jump out of nowhere when you aren't looking.  They are sneaky that's for sure.  But through these challenging times comes transformation.  There is the reward of knowing we work hard and the sense of accomplishment that comes with our dedication.  We are always learning and through this a deep sense of community forms.  We work closely together and we are like family.  
Kamelia, Lauren, Erinn and Shannon bring out fixin's for homemade ice cream
sandwiches to celebrate Naomi's birthday during lunch break.
I feel grateful for the people I work with and for the opportunity to work with the land and so close to our food.  I just want to say thank you for all the support from the farm staff and the members of Waltham Fields Community Farm.  It's so easy to get caught up in day-to-day details. 

I'm learning that it's important to observe through clear and calm eyes and remember to take time to look back on where we have been.  Remember when there were almost no leaves on the trees and the fields were barren only a couple months ago?  And also to bring ourselves to the present of where we are today, once again the fields bursting with a multitude of the color green, full of growth and bounty.  The rhythm of the farm life continues.
Looking forward to seeing some of you at the next Saturday pick up!  Enjoy the harvest,
Anna
Assistant Farm Manager
For the Farm Crew

Tuesday, June 14, 2016

Notes From The Field: Push and Pull

The past week has been all about finding our harvest rhythm again and these smaller early harvests make it a bit easier for us to do that. Just like that, full days that can be dedicated to bed prep, transplanting, cultivating or greenhouse work are gone. Harvesting is rewarding work and this transition is a great one to be in the midst of, but it does take some more mental gymnastics and shifting of expectations to juggle all of the other work needed to ensure we have crops to harvest in 6, 12 or 20 weeks from now. Now that the CSA has begun, we'll be harvesting every morning, working together to get in tender greens before the heat sets in and hustling through the late morning to wrap things up by lunch. Time flies in the afternoon as we race to get in transplants, put plastic mulch down for another round of cucumbers or seed 30 trays of Swiss chard in the greenhouse. All throughout the mornings, I'm invigorated when I look out across a field to see weed crew extricating kale from giant amaranth or teasing tiny carrots away from just germinating lamb's quarters. They came out of the gates strong this past week and hand weeded or hoed roughly 10,000 row feet...
...in other words, they weeded... 
almost 2 miles of the farm!

Dan took advantage of the great cultivating weather we've had (hot, dry, windy) and zipped around killing weeds with the Super As, then took it down a few notches to flame weed the carrots, which is most effective when walking at a snail's pace. In the words of Robert Frost, we have many more miles (of weeding) to go this season, and your help would be such a boost if you can make it out to Crop Mob this Saturday. We're hoping for a critical mass of volunteers to make a big impact on our weed population, so come on out to the farm if you have some free time between 9am-noon this Saturday. Stay a little while after for some tasty snacks from Basil Tree catering. The difference that a few extra hands can make during the beginning of weed-bonanza season is tremendous and helps make our crops healthy and vigorous; it also helps our weed crew stay happy! 

Anna, Erinn, Janelle, and the early season garlic. 
This week's share will have some beautiful red and green butterhead lettuce and Swiss chard, both of which we hope to have on the stand pretty consistently throughout the season. Garlic scapes and radishes will make their debut, and will be an option in your share the next couple of weeks. I'm a big fan of the chicory family and heads of frisee will be the first of a few crops from that family that we'll be harvesting over the coming weeks. (If you don't like it raw try it sautéed with garlic scapes, olive oil and balsamic vinegar.) Kale, bok choy and spinach will round things out. On the horizon we've got a few nice plantings of beets coming on, along with some very baby summer squash that should be ready for picking soon. Pick your own crops are coming along nicely and we'll see some more peas and herbs added to the list soon. For this week though, I hope you enjoy the quintessential taste of early CSA with the sugar snap peas. I also hope you'll find some stillness and solace in the quiet rows of green and coming abundance while you're out in the fields this week.


With Gratitude,
Erinn, for the farm team

Friday, August 10, 2012

Coconut Red Curry Summer Vegetables


The summer crops just keep on rolling in with the waves of heat and moisture. Some of these items, such as the cucumbers patiently awaiting their transformation into canned bread and butter pickles, have been set aside for a specific cooking project. Others, however, are usually prepped and cooked up, on the fly, into a quick and satisfying stir fry, a plate of buttery, sauteed veggies, or a creamy coconut curry. Inspired by a favorite cookbook of mine and a recent evening out, I decided to put almost all of my CSA goodies to use in the following entree-style dish.


Coconut Red Curry
Summer Vegetables

Makes about 4 servings

Ingredients:
  • 1/4+ cup oil (I used walnut)
  • 2-3 Asian eggplants, sliced into thick pieces
  • 1 pint okra, sliced lengthwise, OR 1 pint green beans (or a combo!)
  • 2-4 cloves garlic, sliced
  • 2 tbsp fresh ginger, finely-grated
  • 1 medium onion, chopped into 1-inch pieces
  • 1/4 green or red bell pepper, chopped into 1-inch pieces
  • 2 carrots, sliced into thin rounds
  • 2 cups green or yellow summer squash(es), sliced into quarter-inch rounds
  • 1 tomato, sliced into half-rounds
  • 1/2 of 1 jalapeno OR Serrano hot pepper, thinly-sliced (optional)
  • 1 can of unsweetened coconut milk
  • 2 tbsp red curry paste 
  • 1 tbsp sugar (optional if you prefer a sweet sauce)
  • zest of 1/2 of a lime, finely grated
  • 1 bay leaf
  • 1/2 cup raw cashews, coarsely-chopped (optional, not shown)
  • juice of 1 lime
  • salt and pepper to taste
  • 1/4 cup fresh cilantro or basil, finely chopped

Directions:

In a medium frying pan, heat 2+ tablespoons oil over medium-high heat; when hot, carefully add prepped eggplant and okra, and fry for 1-2 minutes or until the veggies have some browning. Quickly remove from the pan and place on a paper napkin or parchment to sop up extra oil; set aside.

Again in a medium pan, heat the other 2 tablespoons of oil over medium heat. Add the garlic, ginger, onion, and bell pepper, sauteing for about 2-3 minutes. While doing so, whisk together the coconut milk, curry paste, sugar (if using), lime zest, and bay leaf in a small bowl; set aside. Add the carrots to the pan, saute another 2-3 minutes, then add the squash, tomato, and hot pepper, sauteing for another minute or so. Turn up the heat, add the coconut milk mixture to the pan, and bring to a simmer; cook until the carrots are fork-tender, somewhere between 5-10 minutes. Turn off the heat, add the eggplant, okra, lime juice, and cashews, if using; gently stir to combine. Season with salt and pepper, as needed, garnish with prepped herbs, and serve immediately.

Goes very nicely with quinoa and rice!


Rebekah

Images by Rebekah Carter (2012). Recipe inspired by Didi Emmons' "Entertaining for a Veggie Planet."

Thursday, July 19, 2012

Napa Cabbage and Carrot Salad with Tuk Trey Dressing


Until a few years ago, I only knew basil as a flavor of the Mediterranean. Now, however, it is a beloved addition to the many Asian-inspired dishes I frequently cook up with my CSA produce. Last summer I discovered my taste for sauteed eggplant and basil; this summer I've fallen in love with this Cambodian-style salad featuring several local crops and tossed in a light but robust-flavored tuk trey dressing.


Napa Cabbage and Carrot Salad
with Tuk Trey Dressing
Makes about 4 small or 2 large salads

Ingredients:
  • 1/2 head of Napa or Chinese cabbage, shredded
  • 2-4 carrots, grated or sliced thin
  • handful of fresh mint and basil, chiffonade sliced
  • 1 cup peanuts, finely chopped
  • Tuk Trey dressing (see below)

Directions:

Prepare ingredients as described. In a large bowl, toss cabbage with carrots. Serve on plates, garnishing with herbs and nuts; drizzle with dressing and serve immediately.


Tuk Trey Dressing
Fills about 1 half-pint jar

Ingredients:
  • 1/4 cup water
  • 1/3 cup fish sauce
  • 3 tbsp sugar
  • 5 tsp fresh lime juice
  • 1 clove garlic, crushed
  • 1 small onion or shallot, minced
  • salt to taste, if needed

Directions:

In a large bowl, whisk ingredients together; taste and add salt, if needed. Use immediately; refrigerate remaining dressing in a non-reactive container.


Rebekah

Images by Rebekah Carter (2012). Dressing recipe adapted from the Elephant Walk Cookbook via About.com; salad recipe inspired by the Elephant Walk in Waltham, MA.

Sunday, March 25, 2012

Asian Stock & Simple Soup

So it was too good to be true (the incredibly warm weather we just experienced, that is). Like a touch of summer to be relished amidst the transition from winter to spring, the heat came and went, and we are now back to the reality of chilly springtime weather in New England. Which isn't so bad if you have the right supplies on hand.

For me, getting through the cooler, typically-soggier days of March, April, and early May in anticipation of warmer weather means making soup. Meat or vegetable-based, hearty and chunky or light and brothy, I try to do a little bit of everything. With some Napa left over from making kimchi and a bunch of cilantro and Thai basil needing to be used, I set out to create a Asian-inspired stock and a simple, light soup of cabbage, mushrooms, scallions, and noodles. Consider adding little shrimps, cubes of tofu, or shelled edamame for a protein-boost.

Asian Stock
Makes (a little over) 2 quarts

Ingredients:
  • 1 gallon of water
  • 3-inch piece of ginger, peeled and sliced
  • 3 medium onions, unpeeled and quartered
  • 4 cloves of garlic, unpeeled and crushed
  • 6 stalks of celery, cut into 1-inch chunks
  • 4 carrots, cut into 1-inch chunks
  • 10 oz mushrooms
  • juice of 1 lime
  • 1 small bunch of cilantro, leaves & stems
  • 1 bay leaf
  • 8 peppercorns
  • salt to taste
Directions:
Throw all of the ingredients into a large pot, bring to a boil, and simmer, uncovered, for about 3 hours; stir occasionally and add more water if necessary. Turn off the heat, allow it to cool for 15 minutes, and then strain out solids using a fine-mesh sieve or cheesecloth-lined colander. Transfer the stock into airtight containers; store it in the fridge for up to a week or in the freezer for up to three months.

Simple Soup
Makes about 2 servings

Ingredients:
  • 1 tbsp oil (I used walnut)
  • 1 clove garlic, sliced
  • 2 cups Asian cabbage, thinly sliced (can substitute cooking greens like kale, tatsoi, or mustard greens)
  • 1 cup mushrooms, sliced (I used a blend of shiitake & oyster)
  • 1 quart Asian stock
  • 1 cup al dente soba or cellophane noodles (cooked with whole Thai basil leaves for extra flavor)
  • 4 scallions, chopped (can substitute spring onions)
  • 2 tbsp cilantro, finely chopped
  • soy sauce/salt and pepper to taste
Directions:
Heat a pot with oil and garlic over medium-low heat until fragrant. Turn up the heat and add the cabbage; saute for a minute, then add the mushrooms and saute one more minute. Add the stock, noodles, and the white part of the scallions to the pot and bring to a simmer. Turn off the heat and stir in the cilantro and green parts of the scallions. Serve with fresh Thai basil, sliced lime, sriracha, and fish sauce on the side. Just like the stock, store it in airtight containers in the fridge for up to a week or in the freezer for up to three months.


Rebekah

Image by Rebekah Carter (2012).

Sunday, March 18, 2012

Green Vegetable Green Curry

I feel like I'm a day late and a buck short on this post. The idea to cook up a green vegetable green curry dish coincidentally came to mind just prior to March 17. And though I did prepare the meal on Friday and have been enjoying it all weekend long, here I am, telling you about it post-Paddy's Day. But all is not lost, my friends. This entree is quite versatile as far as veggie additions go, and is sure to be a staple in this house when all those summer tenders start to appear at the CSA stand. Though I did not, you can easily incorporate more protein, perhaps in the form of sliced chicken, beef, tofu, or shelled edamame, into this dish; just decrease some of the vegetable amounts to make room in the pan. I recommend serving the curry with brown rice.

Green Vegetable Green Curry

Makes about 4-6 servings

Ingredients:
  • 3 tbsp oil (I used walnut)
  • 6 cloves garlic, thinly sliced
  • 2-inch piece of ginger, thinly sliced
  • 2-4 tbsp green curry paste (use judgement; flavor/sodium depend on brand)
  • 2 scant cups asparagus or green beans, chopped
  • 2 scant cups Asian (opo, fuzzy melon) or summer squash (zucchini, yellow), sliced
  • 2 scant cups Thai eggplant, quartered (can substitute other dense variety)
  • 1 cup bamboo shoots
  • 1/4 cup green bell pepper, sliced into 1-inch pieces
  • 1/2-1 hot pepper, sliced (I used a whole jalapeno- pretty SPICY!)
  • juice of 1/2 lime
  • 1 can unsweetened coconut milk
  • 1 tbsp fish sauce
  • 1 tbsp sugar
  • touch of finely grated lemon and lime zest
  • 1 bay leaf
  • salt or soy sauce to taste
  • 1/4 scant cup Thai or sweet basil, chopped
  • 1/4 scant cup cilantro, chopped
Directions:
In a large pan, heat the oil over medium-high flame. Add the garlic and ginger, cook for a minute or so, and then add the curry, cooking another thirty seconds. Add your vegetables and saute for a few minutes; add the lime juice to deglaze the pan. In a small bowl, whisk together the coconut milk, fish sauce, sugar, lime and lemon zest; add to the pan along with the bay leaf and turn the heat down to medium-low; allow the curry to simmer for about 15 minutes. Garnish with basil and cilantro.


Rebekah

Images by Rebekah Carter (2012).

Wednesday, March 14, 2012

Kimchi


Kimchi is a classic Korean dish of fermented vegetables such as cabbage, radish, cucumber, and alliums (garlic, onion, scallions). Though pickled foods were once heavily relied upon as a major source of vitamins and minerals during the winter months in cooler climates, the increased availability of fresh produce year-round has transformed the practice into more of a tradition than an outright need in many parts of the world. Even so, the distinctly-flavored dish, which is high in fiber, vitamins C, K, and B9 (folate), and lactic acid bacteria while low in calories, has become evermore popular around the globe and can be easily prepared at home.


Kimchi

Makes about 2 quarts

Ingredients:
  • 1 large head of cabbage (Napa, Chinese, or Savoy)
  • 1/2 cup salt
  • 1 gallon cool water
  • 10 cloves garlic, peeled and thinly sliced
  • 2-inch piece of ginger, peeled and grated (I used a microplane grater)
  • 1/2 cup chili powder (Korean recommended; I used New Mexican)
  • 1 cup daikon radish, peeled and thinly sliced (Can also use spring/summer radishes)
  • 1 cup carrot, peeled and julienne cut
  • 1 apple or pear, peeled and finely chopped or 1 tsp sugar
  • cayenne pepper to taste (optional)
  • 1/4 cup fish sauce or water

Directions:

Wash the cabbage leaves, drain, and chop them into one-inch pieces. Fill a large bowl with the salt and water, stirring to dissolve the salt. Add the cabbage to the brine, covering with a large plate to keep it submerged. Allow it to sit for two hours.

While you are waiting on the cabbage, you can prepare the chili paste. The really quick and easy way is to throw your garlic, ginger, fruit or sugar, fish sauce or water, and chili powder into a food processor and buzz it into a puree. However, I do not own such luxurious equipment! So I had to put in a little more time and elbow grease. I grated the ginger (you could also grate the garlic if you want) and whisked it with the chili powder, a few shakes of cayenne pepper to up the heat, and fish sauce (or water) to get a paste-like consistency. I thinly sliced the garlic and finely chopped the fruit but kept these items to the side. While waiting on your cabbage, you can also julienne cut carrots and thinly slice your radish(es).

After letting the cabbage soak, drain and rinse it. Then using your hands (I advise wearing gloves if you have any small cuts), gently squeeze as much moisture out of the cabbage as you can, placing it into another large bowl as you go. Add the carrots, radish, garlic, fruit (or sugar), and chili paste and toss so that all pieces are thoroughly coated with the paste. Pack the kimchi into 2 glass quart jars, tightly seal, and place in a cool, dark place. Allow the kimchi to sit for one or two days until it begins to ferment; you'll know it's "working" when it gets a little bubbly. The kimchi should then be stored in the refrigerator and consumed within a month.


Enjoy as a snack, appetizer, or condiment.


Rebekah

Images by Rebekah Carter (2012). Recipe adapted from
David Lebovitz.

Friday, February 10, 2012

Muhammara

Muhammara is one of those foods that upon first taste I thought to myself, "why have I NEVER had this before?!" Lightly-toasted walnuts and roasted red bell peppers are chopped, blended, and seasoned to make a bold and heart-healthy spread, sandwich-filler, or salad-topper. Smooth or chunky, you can't go wrong with this combination of flavor. If serving as a dip, garnish the bowl with pomegranate arils and fresh mint for a more elegant presentation.

Muhammara
Makes about 1 1/2 cups

Ingredients:
  • 1 cup raw walnuts
  • 1 large or 2 small red bell peppers
  • 2 garlic garlic cloves
  • 1 tsp red pepper flakes
  • 1 1/2 tbsp lemon juice
  • 1 1/2 tbsp pomegranate molasses (available at most Middle Eastern, natural, and whole foods stores)
  • 1/2 tbsp paprika
  • 1/2 tsp cumin
  • 1/4 tsp black pepper
  • salt to taste (I used 1/2 tsp)
  • 1 tbsp extra virgin olive oil

Directions:
Preheat the oven to 450 degrees F; toast walnuts until fragrant, about 10 minutes (they should not brown much or at all). On your stove top, roast your bell pepper over an open flame, turning every few minutes with tongs to ensure all sides become charred. Remove the bell pepper from heat and allow to cool until you are able to handle them. Use your fingers to rub and peel off the bell pepper's skin and gently rinse to remove stubborn, sticky charred bits; reserve the pepper flesh in a small bowl and discard the charred skin, stem, and seeds.

In a food processor or blender, pulse or blend all ingredients until desired texture is achieved (chunky for fillers and toppers, smooth for a dip or spread). If you are like me and don't have such equipment, simply chop the nuts (I pulse roughly chopped pieces in my coffee-grinder-turned-flaxseed-demolisher for a smooth spread), peppers, and garlic* into pieces that will yield desired texture. Combine all ingredients in a stand up mixer and blend (or vigorously stir by hand in a medium bowl) until well incorporated. Refrigerate in an airtight container for up to a week.

*I love garlic, and it sure loves me back. However, I do not enjoy having the taste of raw garlic on my tongue for an entire day, which is what happens to me if I consume it raw cloves. To tone down its bite, I like to crush or slice the garlic and let it sit in the olive oil in a stainless steel measuring cup on the stove while the walnuts roast and peppers toast. After the oil warms and the garlic becomes fragrant, I discard the cloves and continue on with the recipe.


Rebekah

Images by Rebekah Carter (2012). Recipe adapted from DedeMed Mediterranean Cooking.

Monday, February 6, 2012

Roasted Eggplant Salad

I've had eggplant on my mind for sometime now. Though I've written about it here and there, I most recently wanted to cook up something that involved the whole fruit (that purple skin is loaded with phytonutrients) and would be well-suited as a nutritious, on-the-go meal (warm or cold, in a wrap or pita, on some greens, etc). The following recipe satisfies these requests as well as it does a hungry belly at lunchtime.

Roasted Eggplant Salad
Makes about 4 servings

Ingredients:
  • 2 large eggplants (about 2 pounds)
  • salt
  • 1/3 cup olive oil
  • 2 tbsp cider vinegar
  • 1 tbsp honey
  • 1 tsp smoked paprika
  • 1/2 tsp cumin
  • 4 large garlic cloves, roughly chopped
  • juice of 1 lemon (about 2 tbsp)
  • 1 tbsp soy sauce
  • 1 cup flat parsley leaves, roughly chopped
  • 1/2 cup almonds, roughly chopped and toasted
  • 2 ounces crumbled goat cheese or feta (optional)
  • 1/4 cup finely chopped scallions
Directions:
Heat the oven to 400°F. Cut the eggplant into 1-inch cubes and put in a large bowl. Sprinkle lightly with salt and set aside.

In a small bowl, whisk together the olive oil, cider vinegar, honey, smoked paprika, and cumin. Dab away any extra water that has beaded up on the eggplant and toss with the dressing. Stir in the garlic. Spread the eggplant on a parchment-lined baking sheet and slide onto a rack placed in the center of the oven. Roast at 400°F for about 40 minutes or until very tender and slightly browned; be sure to stir one or twice to ensure the eggplant is not burning. As the eggplant roasts, chop and toast the almonds in a small pan over medium heat until they start to become slightly browned and fragrant.

Remove the eggplant from the oven and let it cool slightly. Whisk together the lemon juice and soy sauce. Return the eggplant to the bowl and toss with the lemon juice mixture. Stir in the parsley leaves, almonds, and most of the cheese, reserving a little. Spread the finished salad in a serving bowl and sprinkle the reserved cheese and scallions on top.


Rebekah

Images by Rebekah Carter (2012). This recipe was slightly adapted from the Kitchn.

Saturday, August 20, 2011

Hot and Spicy Garlic Green Beans


You really know summer's end is near when it's 7pm and you're scrambling to get your recipe du jour cooked up and photographed in what remains of the natural light coming through your kitchen window. Not so long ago, 7 pm offered more than the cool, blue tones I was able to capture in this picture of delicious sauteed green beans. Limited light aside, this side dish (or meal if you're anything like me after a long day of work) is so easy to throw together and extremely open to personal touches. Throw in a handful of nuts or seeds: peanuts, cashews, walnuts, sesame... yum! Got mushrooms? Slice 'em up and add them, too. Use soy sauce or salt. Apple cider, white, or rice vinegar... they all work! Absolutely love cilantro? Give some a rough chop and sprinkle it on right before serving. Just be sure to add the four base ingredients: fresh garlic, green beans, oil, and red pepper flake.

Make the most of those tender summer crops while they're still coming in!

Hot and Spicy
Garlic Green Beans

makes 2 sides or 1 meal portion

Ingredients:
  • 1 pint green beans, stems removed
  • 1 tbsp cooking oil (I used walnut oil)
  • 1-2 cloves garlic, minced or sliced thin
  • 2 tbsp vinegar
  • soy sauce or salt to taste
  • red pepper flake to taste
  • mushrooms, fresh herbs, nuts, or seeds (optional)

Directions:

In a pan over medium-low heat, cook garlic in oil until golden brown. Turn up the heat to medium-high and add the remaining ingredients; toss often to evenly coat the beans with sauce and to avoid burning the garlic. Cook 2-3 minutes or just until the beans are slightly tender. Serve immediately. Goes well with rice!


Rebekah

Image by Rebekah Carter (2011).

Friday, August 12, 2011

Don't husk that corn (yet)! And other grilled vegetables.

Whether during your workweek, weekend, or vacation, grilled vegetables are a summer treat to be enjoyed into the crisp days of autumn. If the simple elegance of brown grill marks aren't enough to convince you, the ease of preparation- chop, whisk, brush, grill, serve- should be adequate reason to try your hand at cooking vegetables, including unlikely candidates such as sweet corn and Swiss chard, over the flames. Below is a classic combination of vinegar, oil, fresh herbs, and spices to try out during your next outdoor cooking adventure. Though I've given approximate measurements for ingredients, this recipe is quite flexible; I encourage you to experiment with the myriad flavors available this time of year in New England. If you've discovered a winning combination, share it with our farm friends on our Facebook page.

Grilled Summer Vegetable Dressi
ng
Makes about 1 cup

Ingredients:
  • 1/4+ cup vinegar (apple cider or balsamic work well)
  • 3/4 cup olive oil
  • 1-3 cloves garlic, minced (depending on preference)
  • 2-3 tbsp fresh herbs, chopped fine (i.e. basil, parsley, oregano, marjoram)
  • 1/2 tsp paprika
  • 1-2 tbsp maple syrup (optional)
  • salt and pepper to taste

Directions for Grilling Veggies:


Slice summer vegetables, such as green onions, eggplant, zucchini, summer squash, carrots, tomatoes, and bell peppers, in half, lengthwise; larger squashes and onions can be sliced again in halves or thirds, as seen fit. Whisk together all dressing ingredients; brush generously onto the vegetables. Grill dressed vegetables over medium to medium-high heat until tender, about 2-4 minutes; flip halfway through cooking. Season with additional salt and pepper, if desired; serve hot or cold.

Grilling Sweet Corn


Carefully pull back husk leaves without detaching them from the stem; replace leaves so that the kernels are once again covered. Silk-side up, hold individual ears under cold running water for several seconds. Grill over medium-high heat for several minutes until husks are browned or blackened, turning throughout for even cooking. Remove husks and season as desired; serve hot.

Grilling Swiss Chard and Kale

Using either the dressing described above or simply a high-quality olive oil, brush or rub the oil onto the greens and sprinkle with salt; grill leaves over medium heat until wilted with crisp edges, about 1-2 minutes; turn greens halfway through cooking. Serve immediately.

Are grilled vegetables healthy?

There is some confusion about the healthfulness of grilling various foods. Rest assured, grilling is a safe and healthy method for cooking your favorite summer fruits and vegetables. Unlike meats, plants lack creatine, an organic acid found in muscle, that combines with sugars naturally present in flesh that form carcinogenic compounds called heterocyclic amines (HCAs) when cooked at high temperatures. More HCAs are formed during grilling compared to other cooking methods due to the tendency to grill meats over high heat for long periods of time. Fat drippings on the grill also create carcinogenic compounds known as polycyclic aromatic hydrocarbons (PAHs) that stick to food surfaces as they are cooked. Marinating meats, cooking at lower temperatures, and preventing flare-ups from fat drippings can greatly reduce your exposure to these potentially harmful compounds when grilling meat.


Rebekah

Images by Rebekah Carter (2011). Information on the healthfulness of grilled foods referenced from The Cancer Project, The Washington Post, and Consumer Reports.

Saturday, July 2, 2011

Roasted Kohlrabi with Romesco Sauce

While picking up my CSA share both this week and the week prior, I couldn't help overhearing multiple people reach the kohlrabi bin and wonder out loud, "what should I do with THAT vegetable?" From its alien-like appearance, those new to kohlrabi may feel a bit overwhelmed by the prospect of cooking this starchy Brassica.


Rest assured, you will not be disappointed by the variety of ways in which you can utilize the crop: shredded raw for slaw or sliced for crudités (uncooked, it tastes very much like broccoli stems), thickly-chopped for roasting, sliced thin for casseroles, boiled, baked, mashed... you can even blanch and saute the leaves with oil or butter. Rich in vitamin C and potassium, expand your dietary boundaries and let kohlrabi become a regular in your summer vegetable lineup.

The following recipe is a simple and delicious Mediterranean side dish, featuring oven-roasted kohlrabi with a chunky (faux) Romesco sauce of red bell pepper, almonds, garlic (scapes), and smoked paprika.

Roasted Kohlrabi
with Romesco Sauce


makes 2 servings

Ingredients:
  • 3 kohlrabi bulbs, peeled and cut into 1" chunks
  • 1 large red bell pepper, seeded and chopped
  • 2 cloves garlic (or scapes), minced
  • 1/2 cup raw almonds, chopped (pine nuts or hazelnuts work, too)
  • 4 tbsp olive oil
  • 1 tsp smoked paprika
  • 1-2 tbsp tomato paste (optional)
  • 2 tbsp red wine vinegar
  • salt and pepper to taste
  • fresh basil, mint, or fennel fronds for garnishing

Directions:


Preheat the oven to 450 degrees F. Heat 2 tbsp of olive oil in an oven-proof pan on the stove; when hot, carefully add the kohlrabi, stir to coat, and place in the oven for 25-30 minutes. Occasionally stir the kohlrabi for even browning.

While roasting the bulbs, heat the other 2 tbsp of olive oil in a pot over medium-low heat; add the garlic (or scapes) and paprika and cook for a few minutes, stirring frequently. Add the bell pepper, almonds, tomato paste (if using), and vinegar; cook until the peppers soften, again stirring frequently to prevent burning. Remove from heat; blend until desired consistency is reached (you could use either an immersion blender or food processor; I suggest the latter because of the nuts). If you would like a thinner sauce, you may need to add a splash of water and blend again. Serve with the kohlrabi and garnish with either fresh basil or mint chiffonade or fennel fronds. Enjoy!

Rebekah

Images by Rebekah Carter (2011). Recipe adapted from Six Course Dinner.

Tuesday, April 19, 2011

Mushroom Risotto with Pan-Roasted Asparagus

Packed with several essential vitamins and minerals made more bioavailable when cooked, asparagus is one of many springtime vegetables that should be enjoyed more often, especially when you can find freshly-harvested varieties at local farmers markets.

The tender stalks, whether thin or thick, make perfect companion to arborio rice prepared into a creamy mushroom risotto. This savory duo is hearty enough to stand alone as a vegetarian or vegan meal (toss in a couple handfuls of spinach to add even more nutrients), but also pairs nicely with rich or braised meats such as lamb, duck, and beef.


Pan-Roasted Asparagus:

Ingredients:
  • asparagus*, rinsed
  • 1 tbsp olive oil
  • 1 tbsp onion or garlic, minced (optional)

*The amount really depends on how much of a role it plays in the meal and how large the stalks are; less if the stalks are thick or your meal features a meat,
more if the stalks are thin or you're preparing these foods as a vegetarian or vegan meal. I suppose the number of people you're feeding should be considered as well!

Directions:

Heat your skillet with oil over medium heat. Add your onion or garlic, if using, and cook until beginning to brown. Increase your heat and add your asparagus, making sure to place the stalks in the pan so that they are not touching each other (this reduces the steaming process that might otherwise predominate the roasting we are trying to achieve). With metal tongs or a spatula, flip the asparagus as it begins to brown a bit, about 1-2 minutes after dropping them in the pan; remove from heat when the spears are al dente.

Mushroom Risotto
(makes 2-4 servings)

Ingredients:
  • 4 c (32 fl oz) mushroom stock (learn how to make your own stock; suggestions below)
  • 2 c sauteed mushrooms (see ingredients and directions below)
  • 2 tbsp butter or oil
  • 1 small onion, diced
  • 1 1/2 c arborio rice
  • 1-2 c spinach (optional; baby spinach preferred)
  • 1/4+ c grated or shredded Parmesan cheese (omit if making a vegan dish)
  • salt and pepper to taste

Directions:


Before heating up your skillet, put your stock in a saucepan over medium-high heat and bring it to a gentle simmer (this helps the rice more quickly absorb the liquid to maintain the integrity of your grains, a.k.a. it prevents your risotto from becoming too mushy).

In a separate pan, heat your butter or oil over medium heat; add your onion, gently frying it for a minute or two. On very low heat, add your rice, stirring constantly to toast it for about 2-3 minutes. Add 2 cups of your simmering stock and your sauteed mushrooms, gently stirring to incorporate the liquid and rice. You will continue to gradually add the stock to the rice so that it is quickly absorbed, stirring gently, until the stock is completely used up. In total, it should take between 15-20 minutes to make the risotto. Before removing it from the pan, taste your rice to make sure it is al dente; if it still has a bit of crunch to it, heat up and add more stock, or if you ran out, simply use water. If you are using it, fold in your spinach with your last addition of stock. Transfer the risotto to a serving dish and sprinkle with Parmesan cheese. Bon appétit!

It's all about the details...


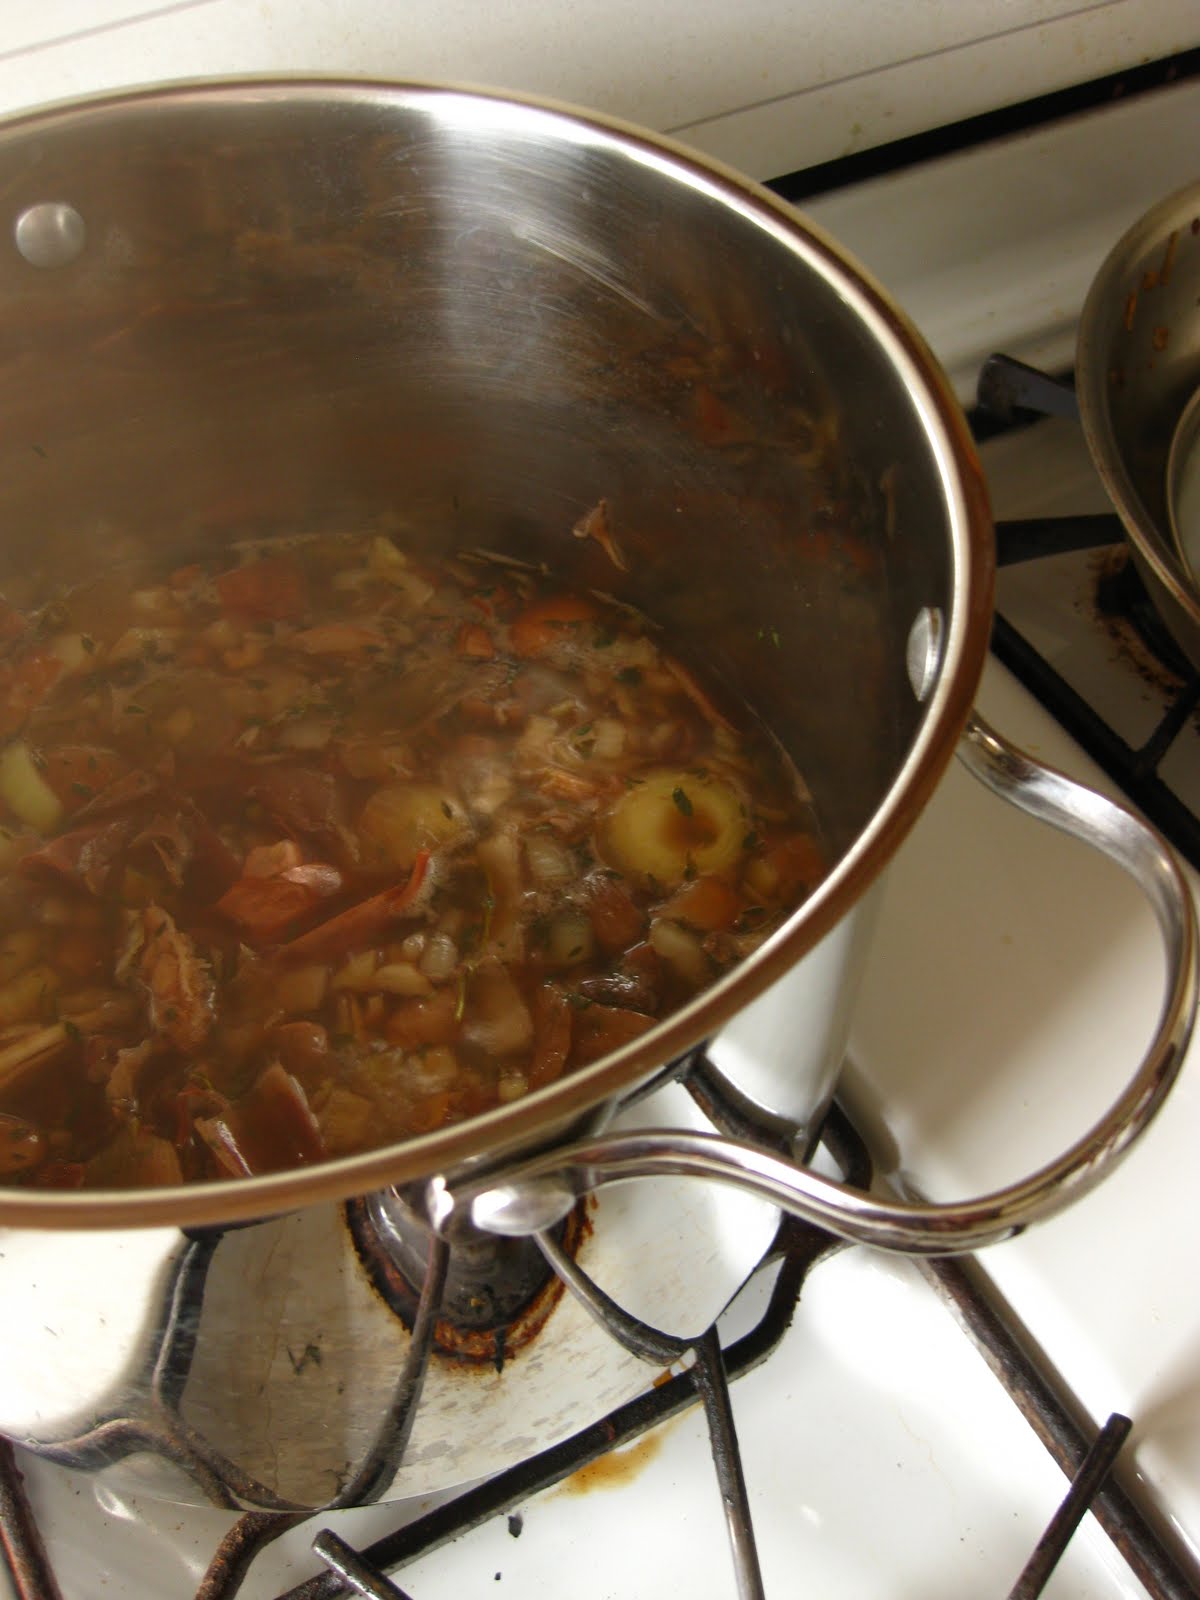
Mushroom Stock:


While you can look back to this post to understand the basics of stock making, here are the ingredients I suggest adding to the pot for this dish:


  • mushrooms, caps and stems (I used crimini and portobello varieties)
  • whole onions
  • whole shallots
  • whole garlic
  • a couple sprigs of fresh thyme
  • pan juices from sauteed mushrooms
  • salt


Sauteed Mushrooms:


I have to admit, I didn't pay attention to the exact measurements of the ingredients, but the image above (what's on the cutting board) is exactly what I used to make the 2+ cups of sauteed mushrooms I added to my risotto. I love mushrooms, so the more the merrier (varieties, too)! If you feel like you have too much to use in your risotto, snack on them while you cook or use them in an omelet, quiche, or sauteed vegetables the following day.

Ingredients (approximations):
  • 4-5 cups crimini mushroom caps, quartered or sliced
  • 2 small or 1 large onion, diced
  • 2-3 cloves garlic, minced
  • 2 tbsp olive oil

Directions:


Heat your skillet with oil over medium-high heat. Add your onions and garlic, stirring often until beginning to brown. Over medium heat, add your mushrooms and a little more oil, if needed; cook the mushrooms, stirring often, until tender. With a slotted spoon, transfer the mushrooms to a separate dish until ready for use; pour the pan juices and bits into your mushroom stock pot.


My Two Cents:


I recommend making your sauteed mushrooms and mushroom stock at the same time so you can take advantage of any pan juices. You can also oven-roast your mushrooms and asparagus; for time and convenience, I prefer to use my stove top. I like big chunks of mushrooms in my risotto, so I quarter mine. I used half butter and half olive oil when making the risotto to get a hint of both flavors, and a wooden spoon or rubber spatula to gently fold the stock & spinach into the risotto as it cooks. Assuming you are serving these two sides together, don't bother starting your asparagus until you've just about finished the risotto; the rice can hold for a bit but the asparagus will get cold pretty quickly. Lastly, don't spoil your culinary efforts by overcooking your vegetables, in this case, your asparagus; be sure to increase the heat for quick cooking and assuredly-al dente spears.

Rebekah

Recipe and images by Rebekah Carter (2011).

Saturday, April 9, 2011

Ginger-Garlic Lentil Soup

For Massachusetts residents, the month of April brings about many simple pleasures: continued seed starting (or visits to seedling sales like those at Waltham Fields), garden bed preparation and planting, the return of Red Sox-everything, the blossoming of trees and perennial flowers, Marathon Monday, and those few, sporadic days of unseasonably warm weather that tease us with visions of summer. Much as those days entice many to throw on tank tops, shorts, and sandals long before it seems truly appropriate, warm April days still leave us with chilly evenings and nights, never mind the more frequent rain showers we tend to experience. And so I share with you my recipe for a bold and delicious lentil soup, featuring freshly-grated ginger and garlic to help keep you in good health during our seasonal transition from the cold to the warm.

Ginger-Garlic Lentil Soup

The Ingredients:
(approximations for 6-8 servings; adjust to your needs and tastes)

  • 1/2+ c carrots, diced
  • 1/2+ c celery, diced
  • 3/4+ c onion, diced
  • 1 1/2 tbsp garlic, finely grated
  • 1 1/2 tbsp ginger, finely grated
  • 1/2 c cilantro, chopped
  • 1/4 c fenugreek, dry or fresh, chopped
  • 2-3 tbsp preferred fat (I recommend chicken schmaltz if you have it; butter or oil work fine, too)
  • hot red pepper flake (optional)
  • 3+ tsp curry powder
  • 1/4 tsp cumin powder
  • 1/4 tsp coriander powder
  • 1 1/2 c dry brown lentils (more or less depending if you want a thick/thin soup)
  • 1 bay leaf (if not used in your stock)
  • 1/8-1/4 c vinegar (white, red, or apple cider work well)
  • 2 1/2+ quarts (80 fl oz) chicken or vegetable stock (click here to learn how to make your own)
  • 1/4-1/2 tsp Dijon mustard
  • dash of white pepper
  • salt to taste

How to Make it:

In a large stock pot over low heat, sweat your mirepoix veggies, garlic, ginger, cilantro, and fenugreek in your preferred fat (you should barely hear your veggies hissing as they are cooking). After your veggies have softened (about 8-10 minutes), add your hot red pepper flake (if using), curry, cumin, and coriander powders, mixing well; cook this mixture for 2-3 minutes. Add your dry lentils and cook for another 2-3 minutes, stirring often. Add your bay leaf, vinegar, mustard, pepper, and stock; give the pot a good stir and check if you need to add more salt. Cook over medium-high to high heat just until the soup begins to boil; reduce heat to low and simmer until the lentils become tender, about 30-40 minutes. Garnish with some fresh scallion and enjoy!


My Two Cents, in no particular order:


When making this soup, I had an open bottle of pinot noir on hand, so I did half red wine vinegar and half straight-up red wine (a good splash of each, about a 1/4 c total). Beer might work well, too, but I haven't tried it for this soup! For the garlic and ginger, I used a grater-zester, which results in a paste; if you like to have little garlic and ginger chunks in your soup, by all means forgo this step and simply mince these ingredients. An easy way to remove the skin from ginger is to scrape it off with a spoon. Mustard is a great flavor-enhancer for most soups, but should be used with discretion; you really shouldn't be able to taste the mustard! So add it little by little, say a 1/4 tsp at a time, giving the pot a good stir and tasting the soup as you go. And as with all dishes and soups, it's recommended that you add salt with each new ingredient (or group of ingredients) to best draw out their flavors. However, depending on the saltiness of your stock, you may want to add less or more. It's a good idea to taste the stock before starting your soup if you are unsure of its sodium content. If you couldn't tell by now, continuous sampling is an essential part of preparing successful meals!

Rebekah

Recipe and images by Rebekah Carter (2011).