Welcome to our blog!

Welcome to our blog! Learn about our farm operation, public programs, and the people behind our work through the Notes from the Field and Education sections. Peruse the Recipes section for some staff favorites.

Waltham Fields Community Farm (incorporated as Community Farms Outreach, Inc.) is a nonprofit farming organization focusing on sustainable food production, fresh food assistance, and on-farm education. For more information about Waltham Fields check out our website!

Showing posts with label onion. Show all posts

Friday, August 10, 2012

Coconut Red Curry Summer Vegetables


The summer crops just keep on rolling in with the waves of heat and moisture. Some of these items, such as the cucumbers patiently awaiting their transformation into canned bread and butter pickles, have been set aside for a specific cooking project. Others, however, are usually prepped and cooked up, on the fly, into a quick and satisfying stir fry, a plate of buttery, sauteed veggies, or a creamy coconut curry. Inspired by a favorite cookbook of mine and a recent evening out, I decided to put almost all of my CSA goodies to use in the following entree-style dish.


Coconut Red Curry
Summer Vegetables

Makes about 4 servings

Ingredients:
  • 1/4+ cup oil (I used walnut)
  • 2-3 Asian eggplants, sliced into thick pieces
  • 1 pint okra, sliced lengthwise, OR 1 pint green beans (or a combo!)
  • 2-4 cloves garlic, sliced
  • 2 tbsp fresh ginger, finely-grated
  • 1 medium onion, chopped into 1-inch pieces
  • 1/4 green or red bell pepper, chopped into 1-inch pieces
  • 2 carrots, sliced into thin rounds
  • 2 cups green or yellow summer squash(es), sliced into quarter-inch rounds
  • 1 tomato, sliced into half-rounds
  • 1/2 of 1 jalapeno OR Serrano hot pepper, thinly-sliced (optional)
  • 1 can of unsweetened coconut milk
  • 2 tbsp red curry paste 
  • 1 tbsp sugar (optional if you prefer a sweet sauce)
  • zest of 1/2 of a lime, finely grated
  • 1 bay leaf
  • 1/2 cup raw cashews, coarsely-chopped (optional, not shown)
  • juice of 1 lime
  • salt and pepper to taste
  • 1/4 cup fresh cilantro or basil, finely chopped

Directions:

In a medium frying pan, heat 2+ tablespoons oil over medium-high heat; when hot, carefully add prepped eggplant and okra, and fry for 1-2 minutes or until the veggies have some browning. Quickly remove from the pan and place on a paper napkin or parchment to sop up extra oil; set aside.

Again in a medium pan, heat the other 2 tablespoons of oil over medium heat. Add the garlic, ginger, onion, and bell pepper, sauteing for about 2-3 minutes. While doing so, whisk together the coconut milk, curry paste, sugar (if using), lime zest, and bay leaf in a small bowl; set aside. Add the carrots to the pan, saute another 2-3 minutes, then add the squash, tomato, and hot pepper, sauteing for another minute or so. Turn up the heat, add the coconut milk mixture to the pan, and bring to a simmer; cook until the carrots are fork-tender, somewhere between 5-10 minutes. Turn off the heat, add the eggplant, okra, lime juice, and cashews, if using; gently stir to combine. Season with salt and pepper, as needed, garnish with prepped herbs, and serve immediately.

Goes very nicely with quinoa and rice!


Rebekah

Images by Rebekah Carter (2012). Recipe inspired by Didi Emmons' "Entertaining for a Veggie Planet."

Thursday, July 19, 2012

Napa Cabbage and Carrot Salad with Tuk Trey Dressing


Until a few years ago, I only knew basil as a flavor of the Mediterranean. Now, however, it is a beloved addition to the many Asian-inspired dishes I frequently cook up with my CSA produce. Last summer I discovered my taste for sauteed eggplant and basil; this summer I've fallen in love with this Cambodian-style salad featuring several local crops and tossed in a light but robust-flavored tuk trey dressing.


Napa Cabbage and Carrot Salad
with Tuk Trey Dressing
Makes about 4 small or 2 large salads

Ingredients:
  • 1/2 head of Napa or Chinese cabbage, shredded
  • 2-4 carrots, grated or sliced thin
  • handful of fresh mint and basil, chiffonade sliced
  • 1 cup peanuts, finely chopped
  • Tuk Trey dressing (see below)

Directions:

Prepare ingredients as described. In a large bowl, toss cabbage with carrots. Serve on plates, garnishing with herbs and nuts; drizzle with dressing and serve immediately.


Tuk Trey Dressing
Fills about 1 half-pint jar

Ingredients:
  • 1/4 cup water
  • 1/3 cup fish sauce
  • 3 tbsp sugar
  • 5 tsp fresh lime juice
  • 1 clove garlic, crushed
  • 1 small onion or shallot, minced
  • salt to taste, if needed

Directions:

In a large bowl, whisk ingredients together; taste and add salt, if needed. Use immediately; refrigerate remaining dressing in a non-reactive container.


Rebekah

Images by Rebekah Carter (2012). Dressing recipe adapted from the Elephant Walk Cookbook via About.com; salad recipe inspired by the Elephant Walk in Waltham, MA.

Friday, July 6, 2012

Greens & Goat Cheese Quiche Tart

As I aim to become more conscious of the food I consume, I'm having fun finding different ways to incorporate local goods into complete dishes and meals. This recipe is a case in point! With exception for the olive oil, salt, and pepper, all of the following ingredients were grown or produced in New England, and many were picked up right at the farm. I used a combination of beet greens and spinach, but Swiss chard or kale would also work just as well. For anyone with a few garlic scapes still kicking around your fridge or garden- these, too, can be substituted for or used in addition to scallion or onion.

For more information on where you can find locally-grown and produced goods perhaps not available through your CSA or local farmers market, such as particular pick-your-own crops and dry storage items, I suggest using this website to seek out farms or retailers specializing in these items.


Greens & Goat Cheese Quiche Tart
Makes one 9" tart

Ingredients:

For the tart shell:
  • 1 1/4 cup flour
  • 1/2 tsp salt
  • 1/4 tsp dried basil (optional)
  • 1 1/2 sticks unsalted butter
  • 1/4 cup ice water, strained
For the quiche filling:
  • 2 tbsp olive oil
  • 1 bunch scallions or 3 bunching onions, sliced into rounds (about 3/4 to 1 scant cup)
  • 1/2 bulb fennel, thinly sliced (about 1/2 cup)
  • 1 lb greens, chopped (a great way to use those oft' composted beet greens!)
  • a small handful of basil leaves, chiffonade sliced (about 1/4 cup, loosely filled)
  • 3 large eggs
  • 2 tbsp milk or heavy cream
  • 4 oz goat cheese (or your preferred cheese; gouda seems like a great fit, too!)
  • salt and pepper to taste

Directions:

In a large bowl, combine flour, salt, and dried basil. Add cold butter, chopped into large chunks, and work into dry ingredients using a pastry cutter until you have a shaggy-looking dough with pieces no larger than English peas. Quickly drizzle in the ice water and stir to combine. At this point, the dough should stick together when you pinch a bit of it between your fingers; if it is still very dry and crumbly, add more ice water, tablespoon by tablespoon, until this is achieved. Turn out the dough onto a large piece of plastic wrap, using the wrap to help you create a large, flat disk of dough (fold the edges of the dough toward the center and press down to smooth out any roughness). Refridgerate the dough for one hour or put it in the freezer for 30 minutes.

Heat the olive oil in a large skillet over medium heat. Saute the fennel and scallion or onion until fragrant, about 2-3 minutes. Add the greens, with salt and pepper to taste, and cook until wilted and tender, about 5-8 minutes. Turn off the heat and add the basil, stirring to combine. In a separate bowl, whisk together eggs, milk or cream, and goat cheese; season with salt and pepper.

Remove the dough from the fridge and roll out into an 12 inch circle. Transfer to a 9-inch tart pan with removable bottom. Fold the overhanging edge down inside the tart pan, pressing gently to help it adhere. Using tongs, evenly distribute the greens filling in the tart shell, then pour in the egg mixture, gently tilting the tart pan to ensure an even spread. Bake in an oven preheated to 375 degrees F until the crust is golden and the filling is set, about 35-40 minutes. Serve slightly warm or at room temperature.


 Great served for breakfast, brunch, or a picnic dinner.

Rebekah

Images by Rebekah Carter (2012). Recipe adapted from Flour Arrangements.

Tuesday, May 1, 2012

Dressed Beets with Spring Onion


It's hard to believe that we are now just weeks away from rhubarb, strawberries, and the start of CSA distributions and farmers markets in New England. In preparation for this season, I'm exploring cookbooks, websites (the farm already has some great ideas, too), and just generally keeping my eyes peeled for healthy new recipes and ideas to share with you in the months ahead. Considering beets and spring onions are some of the earlier crops to be harvested, I thought it would be nice to share with you this simple preparation for roasted beets. Delicious on a salad or sauteed greens (how about those from the beets themselves?), sweet and tender beets tossed in a tangy vinaigrette are great served cold or hot. With all the beets that I frequently pick out for my weekly share, I predict I'll be making these, along with many a slaw and salad, for those hot and humid lunches on the farm.

Dressed Beets with Spring Onion
Makes about 6 servings

Ingredients:
  • 3 medium beets (about 2 lbs, roots only)
  • olive oil to drizzle
  • 1 tbsp apple cider vinegar
  • 1 tbsp balsamic vinegar
  • 1/4 tsp Dijon mustard
  • 1/4 tsp maple syrup (optional)
  • 1/4 cup oil (I used walnut oil)
  • 1-2 small spring onions, thinly-sliced
  • salt and pepper to taste

Directions:

Preheat the oven to 400 degrees F. Wash the beets, drizzle lightly with olive oil, and wrap in aluminum foil. Place the wrapped beets in a baking dish and roast until tender throughout, about 45-60 minutes. Remove them from the oven and allow to cool for five minutes or until you can handle them.

While waiting for the beets to cool, slice the onion or scallion, separating the white from green pieces, and set aside. In a small bowl, whisk together the vinegars, mustard, sugar (optional), oil, and salt until well combined.

Using clean hands, rub off the beets' skin (tough spots can be removed with a peeler). Slice the beets in half and then again into 1/4"-thick half-rounds or smaller; transfer to a deep bowl. Add the white parts of the onion and dressing, tossing or mixing with a rubber spatula to coat evenly. The dish can be served immediately but tastes even better when allowed to marinate for another 12-24 hours in the fridge. When ready to serve, sprinkle with the green parts of the onion. Consume within 5-7 days.

Dressed beets atop a bed of spring mix with red quinoa and goat cheese (a sprinkle of feta, sunflowers seeds, and balsamic vinegar were added after this picture was taken to make for an awesome lunch.)


Rebekah

Images by Rebekah Carter (2011-2012).

Monday, April 2, 2012

French Lentil Salad

I am a girl on the go. Between grad school, part-time jobs, and the return of gardening season, only so much of my day can be dedicated to the many, ever-changing culinary adventures I dream up. So when it comes to actually getting in the kitchen and cooking, I often try to develop healthful recipes yielding meals that can be eaten now, later, or several days or weeks from their initial preparation.

This fabulous vegetarian lentil salad, featuring raisins, walnuts, feta, and fresh mint, certainly fits the bill and is loaded with flavor and nutrients. Pair it with some sauteed greens and whole wheat pita bread, brown rice, or roasted winter squash and you've got yourself one tasty meal.

French Lentil Salad
Makes about 4 servings

Ingredients:
  • 1 cup uncooked French lentils (can substitute black lentils, pictured above)
  • 2 cups water
  • 1/3 cup raisins, chopped
  • 1/2 cup walnuts, toasted and chopped
  • 6 scallions or 1 small spring onions, finely chopped
  • 2 tbsp olive oil
  • juice of 1 lemon (about 1/4 cup)
  • 1/2 cup feta cheese, crumbled
  • 1/4 cup mint, finely chopped
  • salt and pepper to taste

Directions:

To toast the walnuts: Preheat the oven to 450 degrees F; toast walnuts until fragrant, about 10 minutes (they should not brown much or at all).

In a small pot, combine the lentils and water and bring to a boil; reduce the heat and simmer the lentils until tender (not mushy!), or for about 20-25 minutes. Add the raisins and let simmer another minute or two. If there is excess water remaining in the pot, drain the lentils in a fine mesh sieve.

In a bowl, combine the lentil-raisin mixture with the walnuts, scallion or onion, olive oil, and lemon juice and gently toss; add the feta and mint just prior to serving, toss, and season with salt and pepper. Serve warm, at room temperature, or chilled.


Rebekah

Image by Rebekah Carter (2012). Recipe adapted from Didi Emmons' Entertaining for a Veggie Planet.

Sunday, March 25, 2012

Asian Stock & Simple Soup

So it was too good to be true (the incredibly warm weather we just experienced, that is). Like a touch of summer to be relished amidst the transition from winter to spring, the heat came and went, and we are now back to the reality of chilly springtime weather in New England. Which isn't so bad if you have the right supplies on hand.

For me, getting through the cooler, typically-soggier days of March, April, and early May in anticipation of warmer weather means making soup. Meat or vegetable-based, hearty and chunky or light and brothy, I try to do a little bit of everything. With some Napa left over from making kimchi and a bunch of cilantro and Thai basil needing to be used, I set out to create a Asian-inspired stock and a simple, light soup of cabbage, mushrooms, scallions, and noodles. Consider adding little shrimps, cubes of tofu, or shelled edamame for a protein-boost.

Asian Stock
Makes (a little over) 2 quarts

Ingredients:
  • 1 gallon of water
  • 3-inch piece of ginger, peeled and sliced
  • 3 medium onions, unpeeled and quartered
  • 4 cloves of garlic, unpeeled and crushed
  • 6 stalks of celery, cut into 1-inch chunks
  • 4 carrots, cut into 1-inch chunks
  • 10 oz mushrooms
  • juice of 1 lime
  • 1 small bunch of cilantro, leaves & stems
  • 1 bay leaf
  • 8 peppercorns
  • salt to taste
Directions:
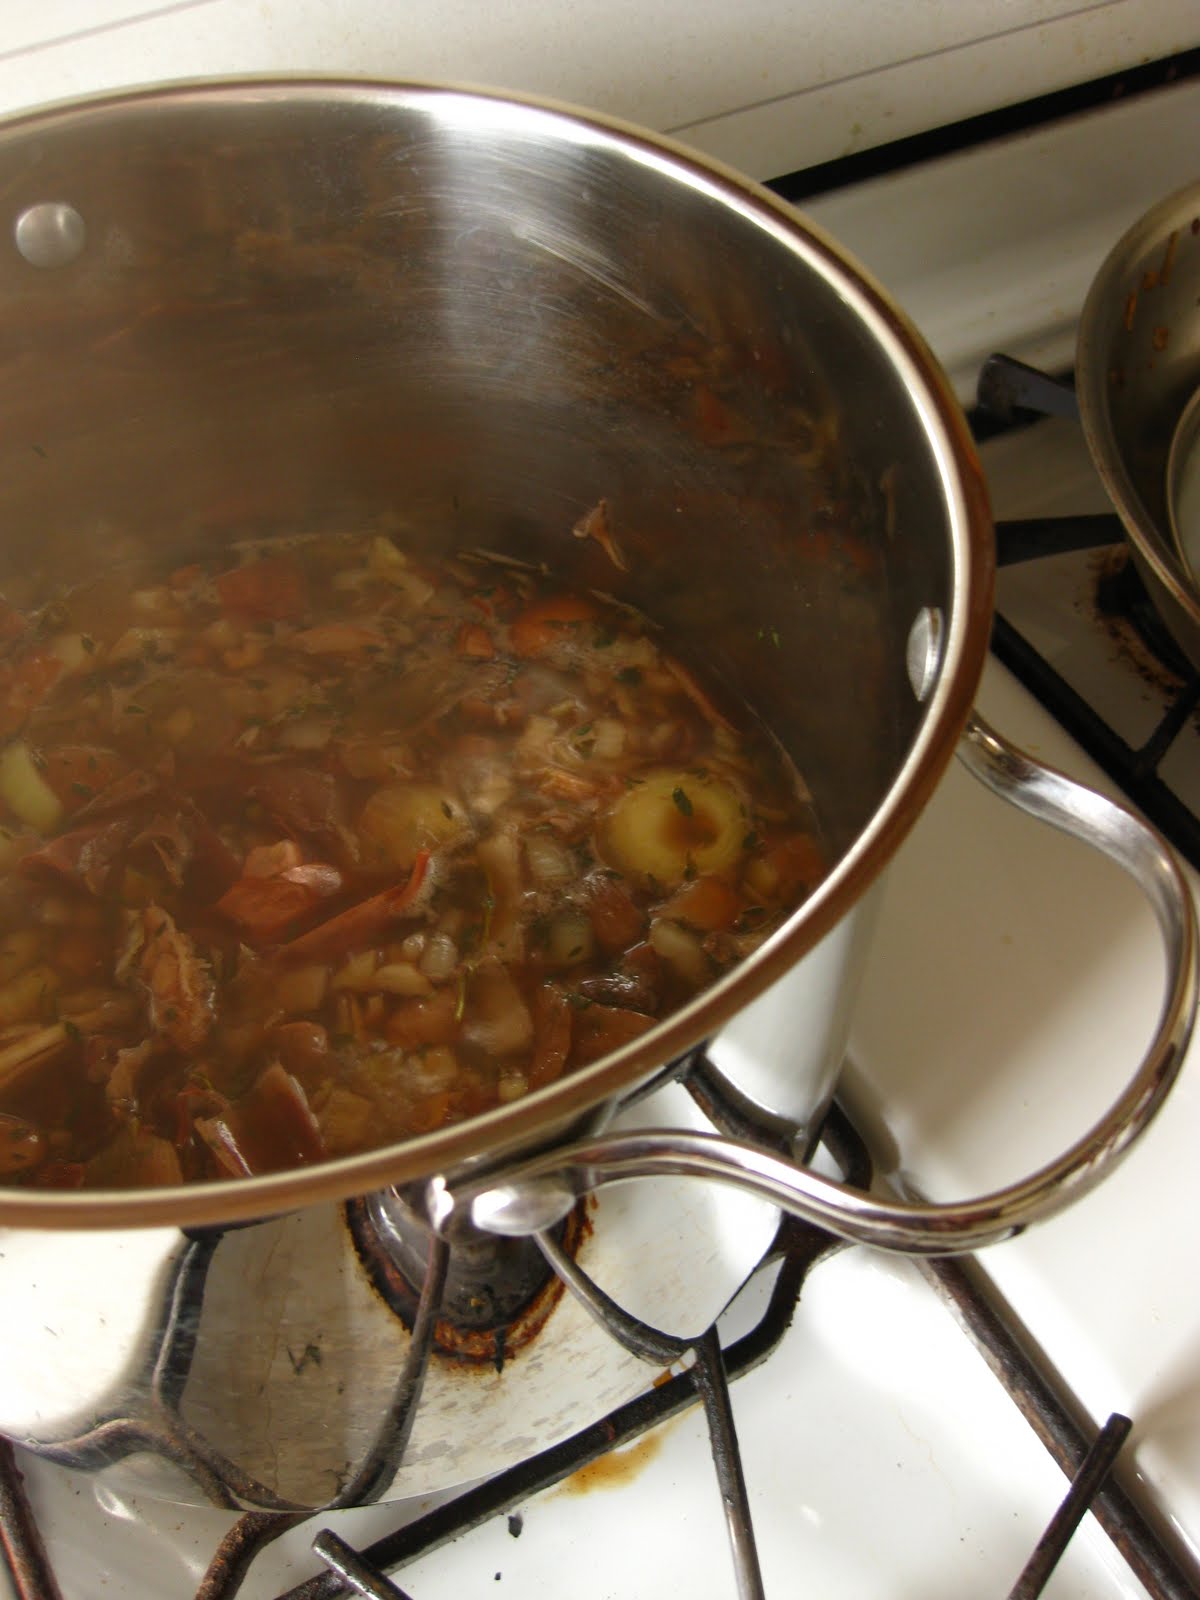
Throw all of the ingredients into a large pot, bring to a boil, and simmer, uncovered, for about 3 hours; stir occasionally and add more water if necessary. Turn off the heat, allow it to cool for 15 minutes, and then strain out solids using a fine-mesh sieve or cheesecloth-lined colander. Transfer the stock into airtight containers; store it in the fridge for up to a week or in the freezer for up to three months.

Simple Soup
Makes about 2 servings

Ingredients:
  • 1 tbsp oil (I used walnut)
  • 1 clove garlic, sliced
  • 2 cups Asian cabbage, thinly sliced (can substitute cooking greens like kale, tatsoi, or mustard greens)
  • 1 cup mushrooms, sliced (I used a blend of shiitake & oyster)
  • 1 quart Asian stock
  • 1 cup al dente soba or cellophane noodles (cooked with whole Thai basil leaves for extra flavor)
  • 4 scallions, chopped (can substitute spring onions)
  • 2 tbsp cilantro, finely chopped
  • soy sauce/salt and pepper to taste
Directions:
Heat a pot with oil and garlic over medium-low heat until fragrant. Turn up the heat and add the cabbage; saute for a minute, then add the mushrooms and saute one more minute. Add the stock, noodles, and the white part of the scallions to the pot and bring to a simmer. Turn off the heat and stir in the cilantro and green parts of the scallions. Serve with fresh Thai basil, sliced lime, sriracha, and fish sauce on the side. Just like the stock, store it in airtight containers in the fridge for up to a week or in the freezer for up to three months.


Rebekah

Image by Rebekah Carter (2012).

Wednesday, March 14, 2012

Kimchi


Kimchi is a classic Korean dish of fermented vegetables such as cabbage, radish, cucumber, and alliums (garlic, onion, scallions). Though pickled foods were once heavily relied upon as a major source of vitamins and minerals during the winter months in cooler climates, the increased availability of fresh produce year-round has transformed the practice into more of a tradition than an outright need in many parts of the world. Even so, the distinctly-flavored dish, which is high in fiber, vitamins C, K, and B9 (folate), and lactic acid bacteria while low in calories, has become evermore popular around the globe and can be easily prepared at home.


Kimchi

Makes about 2 quarts

Ingredients:
  • 1 large head of cabbage (Napa, Chinese, or Savoy)
  • 1/2 cup salt
  • 1 gallon cool water
  • 10 cloves garlic, peeled and thinly sliced
  • 2-inch piece of ginger, peeled and grated (I used a microplane grater)
  • 1/2 cup chili powder (Korean recommended; I used New Mexican)
  • 1 cup daikon radish, peeled and thinly sliced (Can also use spring/summer radishes)
  • 1 cup carrot, peeled and julienne cut
  • 1 apple or pear, peeled and finely chopped or 1 tsp sugar
  • cayenne pepper to taste (optional)
  • 1/4 cup fish sauce or water

Directions:

Wash the cabbage leaves, drain, and chop them into one-inch pieces. Fill a large bowl with the salt and water, stirring to dissolve the salt. Add the cabbage to the brine, covering with a large plate to keep it submerged. Allow it to sit for two hours.

While you are waiting on the cabbage, you can prepare the chili paste. The really quick and easy way is to throw your garlic, ginger, fruit or sugar, fish sauce or water, and chili powder into a food processor and buzz it into a puree. However, I do not own such luxurious equipment! So I had to put in a little more time and elbow grease. I grated the ginger (you could also grate the garlic if you want) and whisked it with the chili powder, a few shakes of cayenne pepper to up the heat, and fish sauce (or water) to get a paste-like consistency. I thinly sliced the garlic and finely chopped the fruit but kept these items to the side. While waiting on your cabbage, you can also julienne cut carrots and thinly slice your radish(es).

After letting the cabbage soak, drain and rinse it. Then using your hands (I advise wearing gloves if you have any small cuts), gently squeeze as much moisture out of the cabbage as you can, placing it into another large bowl as you go. Add the carrots, radish, garlic, fruit (or sugar), and chili paste and toss so that all pieces are thoroughly coated with the paste. Pack the kimchi into 2 glass quart jars, tightly seal, and place in a cool, dark place. Allow the kimchi to sit for one or two days until it begins to ferment; you'll know it's "working" when it gets a little bubbly. The kimchi should then be stored in the refrigerator and consumed within a month.


Enjoy as a snack, appetizer, or condiment.


Rebekah

Images by Rebekah Carter (2012). Recipe adapted from
David Lebovitz.

Saturday, January 21, 2012

Garden Vegetable Soup

For sometime, it seemed like Old Man Winter wasn't going to pull his usual tricks this season in eastern Massachusetts. A glance out the window today proves otherwise. Warm up your body and soul with this simple and quick tomato-based soup loaded with nutritious vegetables. It's also a great way to include any summer favorites you put up, whether canned, dried, or frozen.

Garden Vegetable Soup
Makes about 9 pints

Ingredients:
• 1/4 cup olive oil
• 2 cups chopped onion
• 2 tbsp minced garlic
• 2 scant cups carrots, chopped into rounds
• 2 scant cups diced potatoes (I used an unpeeled Russet)
• 2 cups green beans, broken or cut into 3/4-inch pieces
• 2 quarts (64 oz) chicken or vegetable stock
• 4 cups tomatoes, chopped or crushed
• 1 can tomato paste (no or low sodium)
• 2 scant cups corn kernels
• 1/2 tsp freshly ground black pepper
• 1/4+ tsp dijon mustard
• 1/4 cup packed, chopped fresh parsley leaves
• 1-2 tsp lemon juice
• salt and herbs to taste (I used dried tarragon and basil)

Directions:

Heat the olive oil in large, heavy-bottomed stockpot over medium-low heat. Once hot, add the onion, garlic, and a pinch of salt and sweat until they begin to soften, approximately 7 to 8 minutes. Add the carrots and potatoes and continue to cook for 4 to 5 more minutes, stirring occasionally.

Add the stock, increase the heat to high, and bring to a simmer. Once simmering, add the tomatoes, tomato paste, corn kernels, green beans*, and pepper. Reduce the heat to low, cover, and cook until the vegetables are fork tender, approximately 25 to 30 minutes. Remove from heat and add the parsley and lemon juice. Season to taste with salt and herbs, if desired. Serve immediately or store in the fridge (about a week) or freezer (2-3 months) in pint or quart containers.

This soup can be as simple or complex as you would like. Consider additional or different veggies- whether fresh, frozen, or canned- and herbs for an individualized dish. Some particulars I had in mind were mushrooms, English peas, hearty greens like kale, collards, or even Swiss chard, reconstituted dry beans like cannellini or kidney, or winter squash.

*Unlike the original recipe, I recommend leaving out any tender green vegetables, like fresh green beans, peas, or chard, until the last five or so minutes of cooking for brighter colors and flavors.

This recipe is NOT intended for canning.


Rebekah

Image by Rebekah Carter (2012). Recipe adapted from Alton Brown's Good Eats.

Thursday, September 8, 2011

Red Lentils and Cabbage


All this soggy weather paired with cooler temperatures sure has my body and mind preparing for the arrival of autumn. Salads and crudités were summer mealtime staples, but it's time to transition back to warmer fare. With a large head of Napa in the fridge, a lone tomato on the counter, and plenty of lentils in the cupboard, this slightly sweet and spicy dish was practically calling my name.
Serve it with rice or naan and enjoy.

Red Lentils and Cabbage

Makes 4-6 side servings

Ingredients:
  • 1 1/4 c red lentils
  • 5 c water
  • 1 tsp curry powder
  • 4 tbsp cooking oil (I used walnut)
  • 1 tsp cumin seeds
  • 2-4 cloves garlic, minced
  • 1 medium onion, sliced thin
  • about 3/4-1 lb cabbage, shredded or sliced thin (I used Napa)
  • 1-2 hot peppers, sliced thin (optional)
  • 1 medium tomato, diced
  • 1/2 tsp fresh ginger, grated
  • salt to taste
  • fresh cilantro for garnish (optional)

Directions:


Place water and lentils in a medium to large pot and bring to a boil; remove foam floating on the water surface. Add the curry powder and stir; cover, leaving the lid slightly ajar, and turn the heat down to low. Gently simmer lentils for about an hour; be sure to occasionally stir them during the last 30 minutes so they do not stick to the bottom of the pot.

When the lentils are almost done cooking, add the ginger and tomato to the pot; stir well and cover. In a large pan or pot over medium heat, add the cooking oil. When hot, add the cumin seeds and gently toast them for about half a minute. Add the garlic; as the pieces begin to brown, add the onions, peppers, and cabbage, stirring to incorporate all ingredients. Turn up the heat slightly and stir fry the mixture for several minutes. Add the lentils to the cabbage mixture; simmer another 2-3 minutes. Garnish with fresh cilantro, if desired.


Rebekah

Image by Rebekah Carter (2011). Recipe adapted from Madhur Jaffrey's Indian Cooking via smitten kitchen.

Thursday, August 25, 2011

Pan-fried Eggplant with Basil


I can't say I'm new to the joys of eggplant. Eggplant parm, baba ghanoush, dressed and grilled, I love it all. I can say it was only recently that I discovered how wonderfully the purple-skinned vegetable pairs with basil in an Asian-style sauce. Simple and fragrant, the following recipe is not only easy to prepare, but is also a great way to use up a bunch of those fresh veggies from your local farmers market, CSA, or home garden.

Pan-fried
Eggplant with Basil


makes about 4 servings

Ingredients:
  • 3 medium-sized Chinese eggplants, halved and chopped into 1"-1.5" pieces or 12-16 small eggplant ("Fairy Tale"), halved
  • 2 large bell peppers, sliced into thin strips
  • 1 medium onion, cut into large pieces
  • 3 Thai or serrano chiles, sliced thin
  • 3 tbsp garlic, minced or sliced thin
  • 1/2 c Thai basil leaves, roughly chopped
  • 4 tbsp medium to high-heat oil (I used walnut)

Sauce:
  • 2-3 tbsp fish sauce
  • 1 tbsp light soy sauce
  • 1-2 tbsp sugar
  • 3/4 cup warm water

Directions:

In a small bowl, combine all sauce ingredients, stirring until sugar dissolves; set aside.

In a large pan over medium-high heat, add 2 tbsp of oil. When hot, carefully add eggplant pieces; fry for about 2 minutes, or until they just begin to brown or soften. Remove from pan. Add 1 tbsp oil and onions; cook for about 2 minutes or until soft and glossy. Remove from pan. Add the remaining 2 tbsp oil, garlic, and hot peppers; cook until garlic begins to turn golden, stirring frequently to avoid burning. Add bell pepper and onions; cook for about 30 seconds, stirring frequently. Add eggplant and toss or gently stir to combine all ingredients. Pour in the sauce and stir to ensure even coating; cook for another minute or so, until the sauce thickens a bit. Throw in your basil and cook another 30 seconds; turn off heat and serve immediately.

My Two Cents:

Make this side dish a meal by adding rice and green vegetables; kale or Asian greens sauteed with garlic and oil, or spicy garlic green beans are recommended. Go the extra mile and make it a three-course dinner by serving some overnight pickled cabbage with peanuts as an appetizer and some fresh fruit (melon season has arrived, wink wink) for dessert.

This dish is SO close to being vegan. If you are looking to make it completely free of animal products, try out this recipe for faux fish sauce featuring ingredients such as seaweed and shiitake mushrooms, which create an umami (pronounced "oo-mah-mee;" meaning a pleasant savory taste) quality similiar to that imparted by actual fish sauce.


Rebekah

Images by Rebekah Carter (2011). Eggplant recipe adapted from Epicurious.

Friday, August 12, 2011

Don't husk that corn (yet)! And other grilled vegetables.

Whether during your workweek, weekend, or vacation, grilled vegetables are a summer treat to be enjoyed into the crisp days of autumn. If the simple elegance of brown grill marks aren't enough to convince you, the ease of preparation- chop, whisk, brush, grill, serve- should be adequate reason to try your hand at cooking vegetables, including unlikely candidates such as sweet corn and Swiss chard, over the flames. Below is a classic combination of vinegar, oil, fresh herbs, and spices to try out during your next outdoor cooking adventure. Though I've given approximate measurements for ingredients, this recipe is quite flexible; I encourage you to experiment with the myriad flavors available this time of year in New England. If you've discovered a winning combination, share it with our farm friends on our Facebook page.

Grilled Summer Vegetable Dressi
ng
Makes about 1 cup

Ingredients:
  • 1/4+ cup vinegar (apple cider or balsamic work well)
  • 3/4 cup olive oil
  • 1-3 cloves garlic, minced (depending on preference)
  • 2-3 tbsp fresh herbs, chopped fine (i.e. basil, parsley, oregano, marjoram)
  • 1/2 tsp paprika
  • 1-2 tbsp maple syrup (optional)
  • salt and pepper to taste

Directions for Grilling Veggies:


Slice summer vegetables, such as green onions, eggplant, zucchini, summer squash, carrots, tomatoes, and bell peppers, in half, lengthwise; larger squashes and onions can be sliced again in halves or thirds, as seen fit. Whisk together all dressing ingredients; brush generously onto the vegetables. Grill dressed vegetables over medium to medium-high heat until tender, about 2-4 minutes; flip halfway through cooking. Season with additional salt and pepper, if desired; serve hot or cold.

Grilling Sweet Corn


Carefully pull back husk leaves without detaching them from the stem; replace leaves so that the kernels are once again covered. Silk-side up, hold individual ears under cold running water for several seconds. Grill over medium-high heat for several minutes until husks are browned or blackened, turning throughout for even cooking. Remove husks and season as desired; serve hot.

Grilling Swiss Chard and Kale

Using either the dressing described above or simply a high-quality olive oil, brush or rub the oil onto the greens and sprinkle with salt; grill leaves over medium heat until wilted with crisp edges, about 1-2 minutes; turn greens halfway through cooking. Serve immediately.

Are grilled vegetables healthy?

There is some confusion about the healthfulness of grilling various foods. Rest assured, grilling is a safe and healthy method for cooking your favorite summer fruits and vegetables. Unlike meats, plants lack creatine, an organic acid found in muscle, that combines with sugars naturally present in flesh that form carcinogenic compounds called heterocyclic amines (HCAs) when cooked at high temperatures. More HCAs are formed during grilling compared to other cooking methods due to the tendency to grill meats over high heat for long periods of time. Fat drippings on the grill also create carcinogenic compounds known as polycyclic aromatic hydrocarbons (PAHs) that stick to food surfaces as they are cooked. Marinating meats, cooking at lower temperatures, and preventing flare-ups from fat drippings can greatly reduce your exposure to these potentially harmful compounds when grilling meat.


Rebekah

Images by Rebekah Carter (2011). Information on the healthfulness of grilled foods referenced from The Cancer Project, The Washington Post, and Consumer Reports.

Saturday, June 4, 2011

Rhubarb Chutney


When I hear "rhubarb," a little voice inside of my head always follows with "strawberries!" For the greater part of my life, rhubarb found its way into my belly via one route only: strawberry rhubarb pie. Delicious as it may be, I wanted to try something a little different this rhubarb season, maybe even something beyond the realm of dessert fare. Then along came this recipe for a spiced rhubarb chutney. Though I'm sure it works fabulously as a glaze for pork (I'm thinking chops or ribs) or salmon, it makes for a wonderful last-minute appetizer; add goat cheese, nuts, and toasted baguette slices to the equation and POOF! You've got yourself a delicious hors d'oeuvre. Just don't forget the plate and utensils, if you feel like being fancy about it.


Rhubarb Chutney

(makes 3 half pints)

Ingredients:
  • 4 cups sliced rhubarb
  • 1 cup chopped onion
  • 3/4 cup raisins
  • 2 cups brown sugar (I used maple syrup & white sugar)
  • 1 1/2 cups apple cider vinegar
  • 2 teaspoons salt
  • 1 teaspoon cinnamon
  • 1 teaspoons ginger (I used freshly grated)
  • 1/4 teaspoon ground cloves
  • 1/2 teaspoon mustard seed
  • 1/4 teaspoon hot pepper flakes (optional)


Directions:

Combine all ingredients in a heavy pot (do not use cast iron as the vinegar will strip your seasoning; enamel-lined dutch oven works well) and bring to a boil. Turn down heat and simmer gently until slightly thickened (45 minutes is suggested but decrease simmering time if you want to maintain some rhubarb shape and texture). Be sure to stir frequently as to avoid sticking and scorching. When you are satisfied with the texture, pour into clean pint jars.

If canning, process in a hot water bath for 10 minutes.

My Two Cents:

I did not can my batch nor had brown sugar on hand, so I substituted with a combination of pure maple syrup and white sugar. If you are canning this recipe but want to replace the refined sugar with something like maple syrup or honey, be sure to check with your local extension office first to ensure food safety! From what I've read, mild-flavored honey can safely replace up to half and maple syrup up to a quarter of the sugar called for in a canning recipe. I love using agave nectar whenever possible, but I am not aware of any recommendations on using it as a refined sugar substitute for canning.

Rebekah

Recipe from The New York Times Heritage Cook Book (page 547) by Jean Hewitt via Food in Jars. Images by Rebekah Carter (2011).

Tuesday, April 19, 2011

Mushroom Risotto with Pan-Roasted Asparagus

Packed with several essential vitamins and minerals made more bioavailable when cooked, asparagus is one of many springtime vegetables that should be enjoyed more often, especially when you can find freshly-harvested varieties at local farmers markets.

The tender stalks, whether thin or thick, make perfect companion to arborio rice prepared into a creamy mushroom risotto. This savory duo is hearty enough to stand alone as a vegetarian or vegan meal (toss in a couple handfuls of spinach to add even more nutrients), but also pairs nicely with rich or braised meats such as lamb, duck, and beef.


Pan-Roasted Asparagus:

Ingredients:
  • asparagus*, rinsed
  • 1 tbsp olive oil
  • 1 tbsp onion or garlic, minced (optional)

*The amount really depends on how much of a role it plays in the meal and how large the stalks are; less if the stalks are thick or your meal features a meat,
more if the stalks are thin or you're preparing these foods as a vegetarian or vegan meal. I suppose the number of people you're feeding should be considered as well!

Directions:

Heat your skillet with oil over medium heat. Add your onion or garlic, if using, and cook until beginning to brown. Increase your heat and add your asparagus, making sure to place the stalks in the pan so that they are not touching each other (this reduces the steaming process that might otherwise predominate the roasting we are trying to achieve). With metal tongs or a spatula, flip the asparagus as it begins to brown a bit, about 1-2 minutes after dropping them in the pan; remove from heat when the spears are al dente.

Mushroom Risotto
(makes 2-4 servings)

Ingredients:
  • 4 c (32 fl oz) mushroom stock (learn how to make your own stock; suggestions below)
  • 2 c sauteed mushrooms (see ingredients and directions below)
  • 2 tbsp butter or oil
  • 1 small onion, diced
  • 1 1/2 c arborio rice
  • 1-2 c spinach (optional; baby spinach preferred)
  • 1/4+ c grated or shredded Parmesan cheese (omit if making a vegan dish)
  • salt and pepper to taste

Directions:


Before heating up your skillet, put your stock in a saucepan over medium-high heat and bring it to a gentle simmer (this helps the rice more quickly absorb the liquid to maintain the integrity of your grains, a.k.a. it prevents your risotto from becoming too mushy).

In a separate pan, heat your butter or oil over medium heat; add your onion, gently frying it for a minute or two. On very low heat, add your rice, stirring constantly to toast it for about 2-3 minutes. Add 2 cups of your simmering stock and your sauteed mushrooms, gently stirring to incorporate the liquid and rice. You will continue to gradually add the stock to the rice so that it is quickly absorbed, stirring gently, until the stock is completely used up. In total, it should take between 15-20 minutes to make the risotto. Before removing it from the pan, taste your rice to make sure it is al dente; if it still has a bit of crunch to it, heat up and add more stock, or if you ran out, simply use water. If you are using it, fold in your spinach with your last addition of stock. Transfer the risotto to a serving dish and sprinkle with Parmesan cheese. Bon appétit!

It's all about the details...


Mushroom Stock:


While you can look back to this post to understand the basics of stock making, here are the ingredients I suggest adding to the pot for this dish:


  • mushrooms, caps and stems (I used crimini and portobello varieties)
  • whole onions
  • whole shallots
  • whole garlic
  • a couple sprigs of fresh thyme
  • pan juices from sauteed mushrooms
  • salt


Sauteed Mushrooms:


I have to admit, I didn't pay attention to the exact measurements of the ingredients, but the image above (what's on the cutting board) is exactly what I used to make the 2+ cups of sauteed mushrooms I added to my risotto. I love mushrooms, so the more the merrier (varieties, too)! If you feel like you have too much to use in your risotto, snack on them while you cook or use them in an omelet, quiche, or sauteed vegetables the following day.

Ingredients (approximations):
  • 4-5 cups crimini mushroom caps, quartered or sliced
  • 2 small or 1 large onion, diced
  • 2-3 cloves garlic, minced
  • 2 tbsp olive oil

Directions:


Heat your skillet with oil over medium-high heat. Add your onions and garlic, stirring often until beginning to brown. Over medium heat, add your mushrooms and a little more oil, if needed; cook the mushrooms, stirring often, until tender. With a slotted spoon, transfer the mushrooms to a separate dish until ready for use; pour the pan juices and bits into your mushroom stock pot.


My Two Cents:


I recommend making your sauteed mushrooms and mushroom stock at the same time so you can take advantage of any pan juices. You can also oven-roast your mushrooms and asparagus; for time and convenience, I prefer to use my stove top. I like big chunks of mushrooms in my risotto, so I quarter mine. I used half butter and half olive oil when making the risotto to get a hint of both flavors, and a wooden spoon or rubber spatula to gently fold the stock & spinach into the risotto as it cooks. Assuming you are serving these two sides together, don't bother starting your asparagus until you've just about finished the risotto; the rice can hold for a bit but the asparagus will get cold pretty quickly. Lastly, don't spoil your culinary efforts by overcooking your vegetables, in this case, your asparagus; be sure to increase the heat for quick cooking and assuredly-al dente spears.

Rebekah

Recipe and images by Rebekah Carter (2011).

Friday, April 1, 2011

Cast-Iron Brussels Sprouts

I adore cruciferous vegetables. Long touted for their high-nutrient content, some crucifers are hearty enough to make a meal on their own. Enter: Brussels sprouts. These little cabbages are packed with health-promoting goodness, are typically milder in flavor than full-size cabbage heads, and are just plain cute as the dickens. Seriously, what's not to love about a baby cabbage? Better question: what's the best way to get more of these little guys in your diet? How about this recipe to start:

Cast-Iron
Bru
ssels Sprouts

The Ingredients
  • Brussels sprouts, rinsed
  • Onion, quartered and divided (as much or as little as you like; I used equal parts BS and onion)
  • Butter or oil (I used about 1 tbsp butter for the amount is pictured here)
  • A splash of balsamic vinegar (about 1 tbsp used here)
  • A splash of molasses (about 1 tbsp used here; I realize molasses doesn't exactly "splash" into the pan, but I promise it will quickly loosen up upon hitting that hot skillet!)
  • Salt to taste

How to Make it:


Heat a cast-iron skillet over medium-high heat with butter or oil; add your onions and cook until tender and browned. While the onions caramelize, cut your sprouts in half; if you prefer, cut off the rough ends on the sprouts before slicing them in half. Over high-heat, move the onions to the edges of the skillet and place each sprout half, flat-side down, onto the skillet; cook for a minute or two, or until the flat-side is browned (what culinary types like to call a "hard sear"). Add your balsamic vinegar, molasses, and salt, and stir well to evenly coat the sprouts and onions; cook for another two or so minutes until slightly tender. Bon appétit!

For our omnivorous friends: Try this same recipe but replace the butter/oil with bacon. With your onions, cook bacon strips in "piles" around the skillet until cooked through. Take the bacon out of the skillet, give it a rough chop, and then add it back to the skillet with your sprouts; follow the rest of the recipe as previously mentioned. I brought this version to the Harvest Potluck and it was gone in minutes!

Rebekah

Images by Rebekah Carter (2011).

Thursday, March 10, 2011

New Beginnings (or The Last of The Onions)

I have two onions left in my kitchen from last year's harvest. I must admit that at first I was sad to contemplate the idea of buying onions at the grocery store (knowing they could never be quite as delicious), but then it occurred to me that this sort of finality or "tying up of loose ends" only means that it is time to start again. Adding to this feeling was the dramatic change in scenery that occurred here in the past week. I almost felt as if a magic wand had been waved and the snowy blanket removed to reveal... (drum roll please)... a farm!

last year's squash/fodder for the compost pile

The sudden exposure of all that rich brown earth after a couple months of blinding white seems to be nature's way of saying, "Okay. I've had my rest, now it's time for some new growth."

Well, we are happy to oblige.

We do still have a bit of time before the plants can actually go in the ground (and surely we are not completely shut of snowy weather yet), but last week our farmers cleaned out the greenhouses and began seeding onions, beets, spring brassicas, fennel, and leeks. A number of volunteers have emerged to assist and we very much appreciate the extra hands as we fill flat after flat with the tiny seeds that will grow into nourishment for the mind and body of many individuals and families, whether through preparing and eating healthy snacks in our education programs, purchasing seedlings at our seedling sales, or using produce from our CSA and hunger relief/food access programs.

Dan and volunteers planting leeks

Though there is a lot of work to get done in the greenhouse and the office this time of year and the pace has certainly quickened relative to that of January and February, there is still a remnant of the winter's calm, now lined thickly with anticipation of the busy months ahead. The time when this greenhouse full of freshly planted seeds will be emptied (and then filled again) as the seedlings are transplanted, new generations are seeded, fields are tilled and weeded, and the harvest begins.

Happy Planting,

Jericho

a greenhouse full of flats

If you are interested in volunteering at Waltham Fields Community Farm, please go to the Volunteer Service page of our website for more information.

our Volunteer Kiosk:
be sure to sign-in here!


the Kiosk on the inside (a sneak peak)

Monday, September 20, 2010

Asian Cole Slaw

The chill in the air signals the return of autumn and cold-weather crops, such as those in the Brassicaceae family. Here's a fabulous and healthy recipe that puts the spotlight on Brassica oleracea, otherwise known as cabbage.

As always, feel free to switch things up with different ingredients! This dish is low-fat, vegan, gluten-free*, and delicious.

Fresh Produce:
  • 1 head of cabbage, shredded (red cabbage shown; also good with Napa variety)
  • onion OR scallions, sliced very thin
  • hot peppers, sliced (optional)

Essential Extras:
  • sesame seeds, toasted
  • slivered almonds, toasted
  • crispy/chow mein noodles (optional; not shown)

The Dressing:
  • 1/4 cup vinegar (red wine, rice wine, or apple cider work well)
  • 3/4 cup oil (olive or vegetable work well)
  • 1/2 cup sugar or sweetener of your preference
  • 2 tbsp soy sauce*
*For those on a gluten-free diet, make sure to purchase gluten-free soy sauce as some brands contain wheat.

How to Make it:

Remove the outer leaves of the cabbage head. Shred or thinly slice the cabbage (if you have a mandolin, use it to shred the cabbage; if you do not own such equipment, a large knife will do the job just as well) and place it in a large bowl. Slice the onion or scallions and pepper and add to the cabbage. Cover the bowl and place it in the refrigerator while making the dressing and toasting the nuts and seeds.

The dressing is so simple! Place all ingredients in a pot and bring to a boil for a minute; let cool.

Toast the almonds and sesame seeds separately as the seeds toast faster than the almonds. Even so, the technique is the same: place nuts/seeds in a small pan over medium heat, stirring constantly (don't leave your stove top as the nuts and seeds will burn quickly when left unattended). Toast until the nuts/seeds begin to brown.

Take your bowl of cabbage out of the refrigerator; drizzle on the dressing and toss. Sprinkle on the nuts, seeds, and noodles (not shown) and enjoy.


Media (text and images) created and published by Rebekah Carter 2010.