Welcome to our blog!

Welcome to our blog! Learn about our farm operation, public programs, and the people behind our work through the Notes from the Field and Education sections. Peruse the Recipes section for some staff favorites.

Waltham Fields Community Farm (incorporated as Community Farms Outreach, Inc.) is a nonprofit farming organization focusing on sustainable food production, fresh food assistance, and on-farm education. For more information about Waltham Fields check out our website!

Showing posts with label vegetables. Show all posts

Thursday, September 20, 2012

Notes from the Field: Why We Farm Organically

Yardlong beans and morning glories in the Learning Garden

A recent Stanford University study made news by casting doubts upon whether organic food is, simply by being organic, healthier for us than non-organic food.  The news coverage of the story featured many people being surprised about the fact that organic farms do use pesticides and fertilizers (ones that are on a list approved by the Organic Materials Review Institute), and that organic food does not automatically provide more nutrition or health benefits to its consumers.  One radio report hinted at the fact that 'organic' might just be a ploy by some big companies to be able to charge unsuspecting customers more for healthier-sounding food.


B to F: tomatoes, broccoli, and turnips

I've been mulling over what troubles me about this the coverage of this study (actually a meta-study, which examined a large amount of data collected in experiments over the past couple of decades).  I've read Michael Pollan's response, as well as the argument from Marion Nestle (written prior to the Stanford study's publication) about the ongoing controversy over organic food, and I think I've figured out what it is: for many of us who farm organically, who are not associated with big companies or even big agriculture, organic is not just a consumer label.  In many ways, it has very little to do with how we market our products.

PYO husk cherries, also known as groundcherries

Organic farming is about how we grow, why we do what we do, and our desire to make a positive impact on the world.  I chose organic farming as a profession because I believe that organic production is a scientifically based attempt to create an agriculture that produces economically viable yields of beautiful, nutritious vegetables while remaining as beneficial to the environment, and to farmworkers, as possible.  While I often shorten it to "farmer" when I'm describing what I do, in my heart of hearts, I'm an organic farmer.

Okra flower and young pods

To me, organic doesn't mean boutique farming or baby vegetables, or getting the highest price we possibly can for our crops.  The higher price for organic food is only justified because sometimes it costs more money to grow in a way that is more environmentally thoughtful; composted dairy manure, for example, costs more than synthetic petrochemical fertilizers but is less likely to create pollution if it is well-managed.  (In an ideal world, the cows that produce that manure would also live on the organic farm, but our agricultural world, especially in our urban area, is very much less than ideal.)  Organic farming, to me as a grower, means that I can almost always eat what I grow right out of the ground; it means that my children, and our shareholders, and the people who work on the farm day in and day out, can walk through the fields, pick their own food, and generally eat from the land in a way that minimizes the amount of pesticides they are exposed to.  It means making a conscious effort, day in and day out, to farm in a way that builds healthy soil that grows healthy food.

B to F: carrots and bush beans (and some weeds)

Organic farming isn't perfect.  It can be fuel intensive, input-heavy, labor intensive, expensive, and heartbreaking.  Growing three rows of fennel on a four-foot-wide, two-hundred-foot long bed is certainly not mimicking any natural system I've ever come across.  The pesticides that we are allowed to use under the standards approved by the USDA are not harmless, non-toxic plant compounds; some of them are deadly chemicals that happen to be naturally derived.  Not only that, they are not as effective as the deadly synthetic chemicals that conventional farmers are allowed to use.
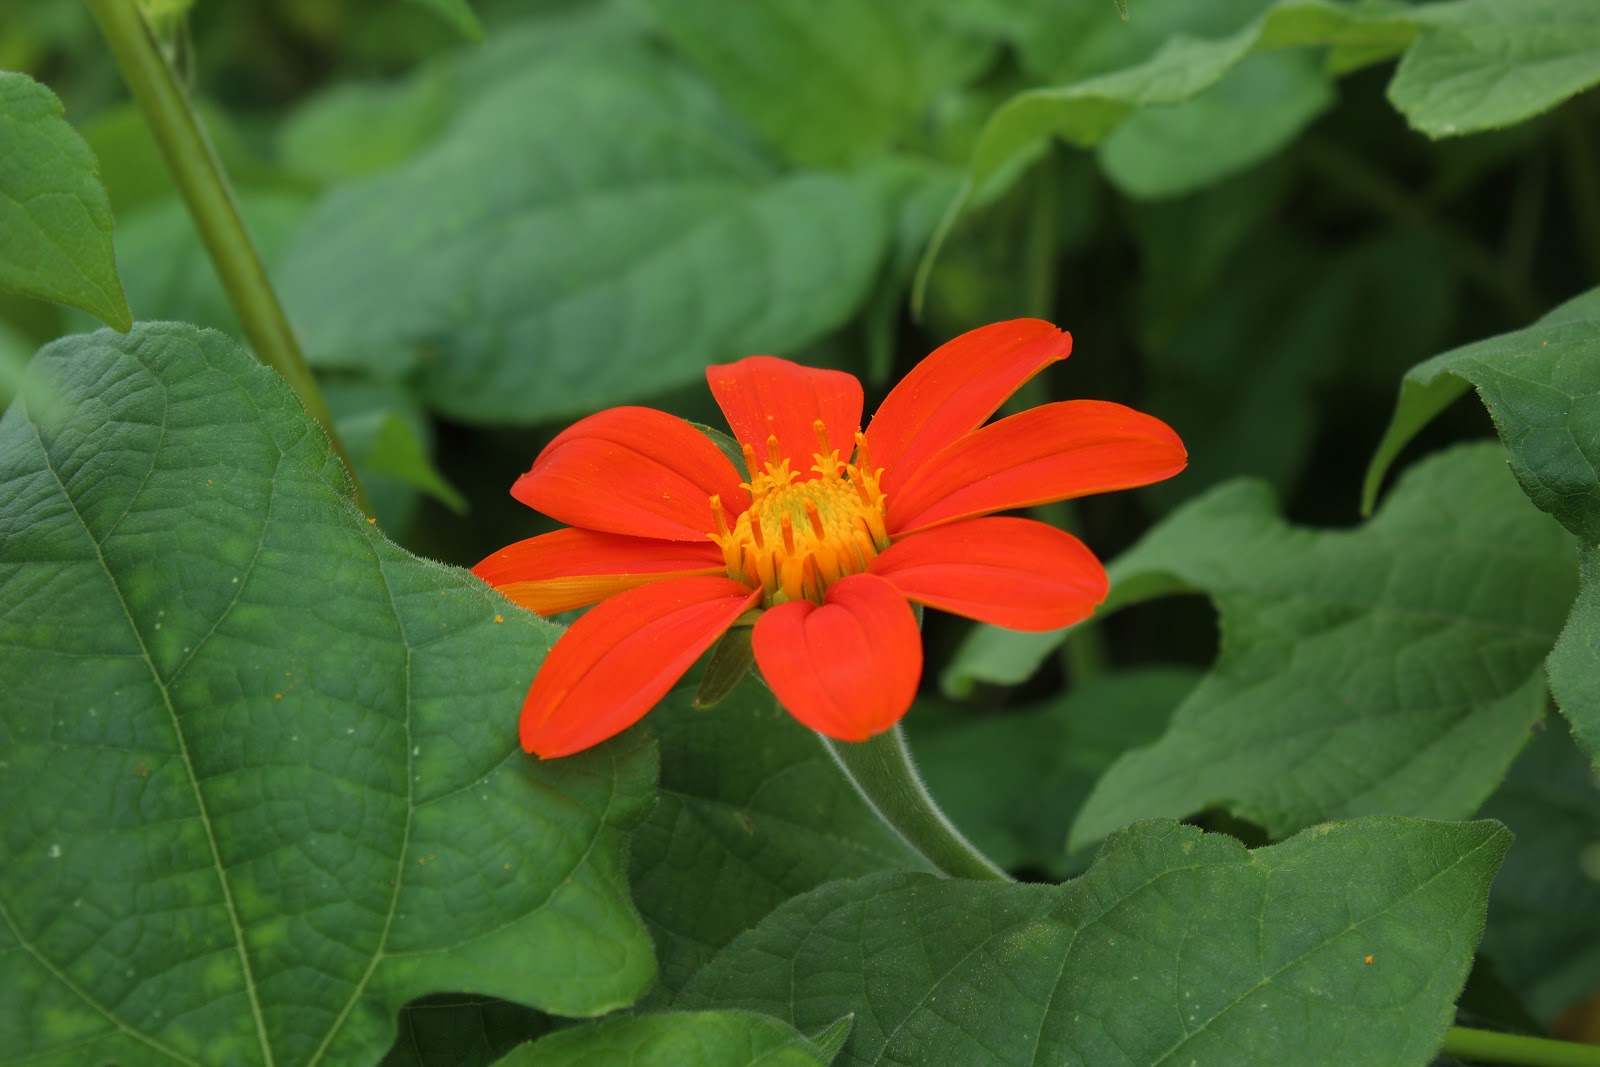
Tithonia, also known as Mexican sunflower

There is much that is still unknown about the way soil functions naturally and how we can build a functioning soil ecosystem that grows nutritious organic vegetables.  And the truth is that not all organic farmers are good farmers; some of us, while well-intentioned, are still learning -- farming, after all, is an art as much as a science, and organic farming takes years of practice to learn well.  A wise, experienced conventional farmer may well grow food with more nutritional value than a sloppy, inexperienced, or negligent organic farmer.  A master farmer -- of any stripe -- is one who grows bountiful yields of highly nutritious vegetables from highly functioning soil; I just happen to believe that organic methods are the road I want to take to get to that level, if I ever do.

Farm-to-plate: a late summer meal made from Waltham Fields' vegetables

There are very few things that I'm willing to say I believe in as I get older.  Even the Red Sox are not what they used to be.  And 'big organic'  is definitely not what 'organic' used to be.  For better or for worse, organic farming has come a long way from the  days of back-to-the-landers with their bug-riddled zucchini and kale.  But the fundamental idea of trying to grow healthy food -- and lots of it --  in a way that is kinder to the earth and to those who work it is one that I do believe in and try to manifest every day.  Making that food available to everyone in our society is another idea I believe in.  And I am truly grateful that, day in and day out, I can practice something that I deeply believe, regardless of the study of the day or the food fad of the week.  That's why we grow organically at Waltham Fields.


Hope you enjoy the harvest,

Amanda, for the farm crew

Images by Rebekah Carter (2012).

Thursday, May 3, 2012

Cupboard Tart


As you may have noticed, I try to keep things pretty healthy on the farm blog. After all, Waltham Fields is primarily a vegetable farm, and just about everyone could use more of this food group in their lives. But many of those keen to consume a "locavore" or "mocavore (mostly locavore)" diet are active preservationists, too. I myself began preserving foods just a few years ago, but still find that by the beginning of the next growing season many a jar of preserves, be they sweet or savory, line my cupboard shelves. So what is one to do? Make what I've called a "cupboard" tart. The idea is simple: use what you've got on hand to make a delicious treat.


For this particular pastry, I used my homemade blueberry jam and peaches, both canned in the summer of 2011 using local produce purchased at peak season. Continuing with this theme, the original recipe for the tart crust called for two sticks of butter and buttermilk; since I only had one stick of butter in the fridge and no buttermilk, I swapped in the remaining coconut spread and nut cream I had on hand from a no-bake chocolate coconut cookie I recently made. It turned out wonderfully!

Cupboard Tart
Makes one 11-inch tart

Ingredients:
  • 2 1/2 cups all-purpose flour
  • 1 teaspoon salt
  • 1 stick of unsalted butter*
  • 4 oz coconut spread*
  • 1/2 cup sweetened nut cream (I used an almond-cashew blend)
  • 1 half-pint jam (I used blueberry)
  • 1 quart whole fruit, drained (I used peaches in light syrup, drained and sliced 1/4" thick)
  • sugar for sprinkling
* To make this vegan, simply use 8 oz of coconut spread or your preferred vegan butter substitute that is suitable for pie crusts.

Directions:

To make the tart dough, place the butter and coconut spread in the freezer for 15 minutes. In a large bowl, sift together flour and salt. Add the fats and cut in with a pastry blender until the dough is crumbly (dough pieces should be no larger than peas). Cover the bowl with a tea towel or plastic wrap and allow to rest at least one hour in the fridge or 30 minutes in the freezer. After this resting, add the nut cream all at once and quickly mix with one hand, breaking up big clumps as needed. Once again, cover the bowl with a tea towel or plastic wrap and allow to rest at least one hour in the fridge or 30 minutes in the freezer.

After the dough has rested, pour the crumbles into the tart pan. Gently push the crumbles into the bottom of the pan and up the sides, creating a crust that is roughly 1/4" thick on the bottom and up to 1/2" thick around the sides. Loosely cover with a tea towel or plastic wrap and place the tart pan in the fridge for an hour or the freezer for 30 minutes.

While you wait, you can prep the filling. Open and stir the jam so it's loosened up for spreading onto the crust. If necessary, drain and slice the whole fruits. This is also a good time to preheat the oven with a separate baking sheet inside to 425 degrees F.


Once rested in the pan, spread the jam onto the bottom of the tart crust in an even layer. Arrange the fruits as you please and sprinkle with sugar (coarse is lovely but the regular stuff is fine, too).

Place the tart pan onto the preheated baking sheet and bake for about 20 minutes (this should prevent the tart crust from getting soggy). Quickly but carefully remove the tart pan from the baking sheet, returning both to the oven with the tart pan on a rack directly above the baking sheet in case of dripping. Bake for another 20-25 minutes or until the pastry's edges begin to turn golden brown. If at any point the pastry begins to darken too much, loosely cover the crust with a ring of aluminum foil for the remaining baking time.

Every little bit counts... extra dough crumbles became a small rustic tart.

This tart can be wrapped and stored on the counter for up to 3 days, but it best eaten within an hour or so of baking... just ask the farmers!


Rebekah

Images by Rebekah Carter (2012). Tart crust recipe adapted from Joy the Baker.

Saturday, January 21, 2012

Garden Vegetable Soup

For sometime, it seemed like Old Man Winter wasn't going to pull his usual tricks this season in eastern Massachusetts. A glance out the window today proves otherwise. Warm up your body and soul with this simple and quick tomato-based soup loaded with nutritious vegetables. It's also a great way to include any summer favorites you put up, whether canned, dried, or frozen.

Garden Vegetable Soup
Makes about 9 pints

Ingredients:
• 1/4 cup olive oil
• 2 cups chopped onion
• 2 tbsp minced garlic
• 2 scant cups carrots, chopped into rounds
• 2 scant cups diced potatoes (I used an unpeeled Russet)
• 2 cups green beans, broken or cut into 3/4-inch pieces
• 2 quarts (64 oz) chicken or vegetable stock
• 4 cups tomatoes, chopped or crushed
• 1 can tomato paste (no or low sodium)
• 2 scant cups corn kernels
• 1/2 tsp freshly ground black pepper
• 1/4+ tsp dijon mustard
• 1/4 cup packed, chopped fresh parsley leaves
• 1-2 tsp lemon juice
• salt and herbs to taste (I used dried tarragon and basil)

Directions:

Heat the olive oil in large, heavy-bottomed stockpot over medium-low heat. Once hot, add the onion, garlic, and a pinch of salt and sweat until they begin to soften, approximately 7 to 8 minutes. Add the carrots and potatoes and continue to cook for 4 to 5 more minutes, stirring occasionally.

Add the stock, increase the heat to high, and bring to a simmer. Once simmering, add the tomatoes, tomato paste, corn kernels, green beans*, and pepper. Reduce the heat to low, cover, and cook until the vegetables are fork tender, approximately 25 to 30 minutes. Remove from heat and add the parsley and lemon juice. Season to taste with salt and herbs, if desired. Serve immediately or store in the fridge (about a week) or freezer (2-3 months) in pint or quart containers.

This soup can be as simple or complex as you would like. Consider additional or different veggies- whether fresh, frozen, or canned- and herbs for an individualized dish. Some particulars I had in mind were mushrooms, English peas, hearty greens like kale, collards, or even Swiss chard, reconstituted dry beans like cannellini or kidney, or winter squash.

*Unlike the original recipe, I recommend leaving out any tender green vegetables, like fresh green beans, peas, or chard, until the last five or so minutes of cooking for brighter colors and flavors.

This recipe is NOT intended for canning.


Rebekah

Image by Rebekah Carter (2012). Recipe adapted from Alton Brown's Good Eats.

Saturday, June 25, 2011

Freezing Berries


Don't let family vacations stop you from loading up on the delicate and delicious berries of summer. With a bit of freezer rearrangement, you can enjoy summer's bounty of raw strawberries, raspberries, blueberries, and more all the way into the cool days of autumn (if they last that long
).

Freezing Berries


1. After purchasing or picking berries, thoroughly sort through them to remove any damaged, overripe/rotten, or immature fruits.
2. If working with strawberries, hull them (remove the calyx, that green, star-shaped "hat" that sits atop the berry); gently transfer the berries to a colander and rinse under cold running water.
3. If working with strawberries, you may wish to slice them at this point; otherwise, gently spread the berries onto a clean baking sheet in a single layer and place in the freezer.
4. Remove the berries from the freezer as soon as they are frozen in order to avoid freezer burn; quickly transfer to plastic freezer bags or containers and return to the freezer for long-term storage.

Berries can be safely stored for 8-12 months in a freezer kept at 0 degrees F.

My Two Cents:

Some argue that berries should be treated with simple syrup or sugar when being frozen. Although this does help maintain the texture, color, and flavor of berries frozen for several months, it is not necessary as freezing is the method of preservation. Many also pat their berries dry and line their baking sheet with parchment paper, but I do not find either of these steps necessary (however, I do make sure to not put sopping-wet berries straight in the freezer).

While the focus of this post was berries, freezing is an excellent way to preserve many local fruits and vegetables with little to no processing. Check out the National Center for Home Food Preservation's website for specific instructions according to crops of interest.

Rebekah

Images by Rebekah Carter (2011). Instructions for freezing berries referenced from
the National Center for Home Food Preservation.

Saturday, April 9, 2011

Homemade Stock

For some, the thought of making one's own vegetable or chicken stock may seem a daunting task best left to corporate entities. I would beg to differ. Homemade stock is really quite easy to prepare and is the perfect way to use up vegetable scraps (skins, ends and all) and the picked chicken carcass leftover from roasting a bird whole. The recipe below is simply an idea base for stock making. Depending on what you plan to make with it, you may want to add or remove certain ingredients, especially particular vegetables, herbs, and spices that will enhance the flavor of your soup or dish. Let your imagination run wild; just be sure to follow specific instructions provided by the USDA if you are making meat or vegetable stock for canning in order to prevent life-threatening foodborne illness.


Chicken Stock
*


The Ingredients:

- cooked & picked chicken carcass (meat scraps, bones, cartilage, skin, pan juices)
- chicken neck (if included)
- carrots
- celery
- onion and/or shallot
- garlic
- herbs (parsley, bay leaf, thyme, cilantro, rosemary, sage)
- salt
- peppercorns
- additional spices as seen fit
- additional vegetables as seen fit (mushrooms, tomatoes, potatoes, bell pepper, fennel, leek, parsnips)


*If you are making vegetable stock, omit the chicken parts and bulk up on the veggies, especially your traditional mirepoix
(pronounced "meer-pwah") ingredients: onion, celery, and carrots. I recommend going heavy on the garlic and parsley for most stocks intended for soup making.

How to Make it:

Simple math should tell us that the more surface area our ingredients have, the more flavor we can extract from them. This said, break up your carcass and peel and chop your vegetables and aromatics (the more fragrant ingredients, including alliums, herbs, and spices), being sure to keep the peels, skins, and ends. Depending on the amount of scraps you have from prior cooking, you may also want to include additional fresh vegetable pieces for a more flavorful stock. Put all of the ingredients in a large stock pot; add cold water (Why cold? To better release the collagen in the chicken, which thickens the stock) until it covers all ingredients by a few of inches; you can always add more water if the level drops too much during cooking. Over medium-high or high heat, cook the mixture just until the point of boiling; reduce heat to maintain a simmer for 3-4 hours if making chicken stock or 2-3 hours for vegetable stock. With tongs or a slotted spoon, carefully remove large pieces of the chicken and vegetables, placing in a metal mesh strainer and pressing on the scraps to retain liquid in your stock pot. Once you've removed all of the chicken parts and the larger vegetable pieces, carefully pour your stock through the same mesh strainer; press on the "catch" left in the strainer and discard.

How to Store it:

If you are using your stock immediately, simply add it to your soup or dish when needed. If you are refrigerating it, portion it into glass jars (those used for traditional canning work well) or airtight plastic containers for easier storage. If you are freezing it, portion it into airtight plastic containers; label and date each container. Stock kept in the fridge should be used and consumed within a week of preparation; frozen stock should be used within three months for flavor and food safety.

My Two Cents:

I generally make stock one day and my soup the day after. While I will use vegetable scraps from prior preparations (such as roasting the bird), I always include additional whole veggies and herbs, roughly chopped, to ensure a delicious outcome. For extra flavor, I scrape off and add the schmaltz (the congealed chicken fat that rises to the top of the stock after refrigeration) to my mirepoix veggies when making the soup instead of using butter or oil. Just one more way to make slightly better use of your food dollars!

Rebekah

Images by Rebekah Carter (2011).